Follow these instructions when replacing an existing 3rd Gen SightSensor for a new SightSensor that ends with -x20 part numbers. You can find your part number on the sticker outside of your new SightSensor.
Note that newer 3rd Generation SightSensors have slightly different IO connectors and plugs. Always use the new IO connector plugs provided with the new SightSensor. Existing IO connectors will not work with new SightSensors.
- Start SightMonitor, log in and disconnect the SightSensor to be replaced.
- Back up the database (click for instructions).
- Close SightMonitor.
- In a bench test environment, set the new SightSensor's IP address and networking to the same as the Sensor being replaced (click for video instructions).
- Verify that the IP address is set and you can ping the SightSensor at the new IP address.
- Remove the existing SightSensor from pole.
- Mechanically mount your new SightSensor on the pole.
- Remove the previous IO connectors used by the old SightSensor and connect the wires to the new IO connectors supplied with the new camera.
Warning! The old IO connector plug will not work with the new SightSensor. You must use the new IO plug supplied with your new SightSensor. Refer to the diagram to confirm.
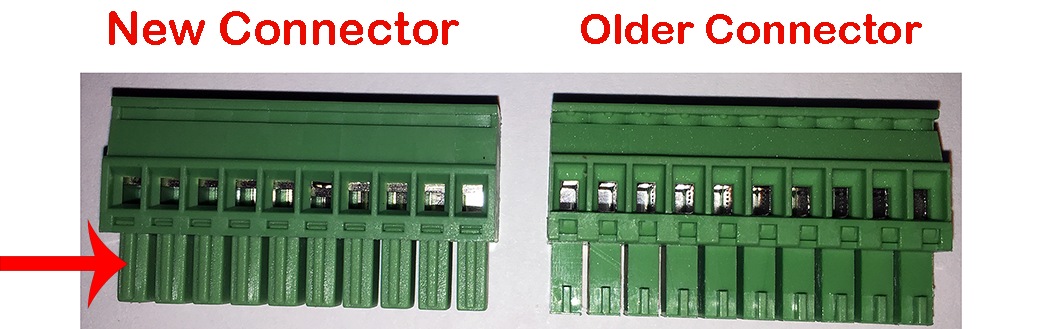
Use your existing wires to connect to the new IO connection plugs.
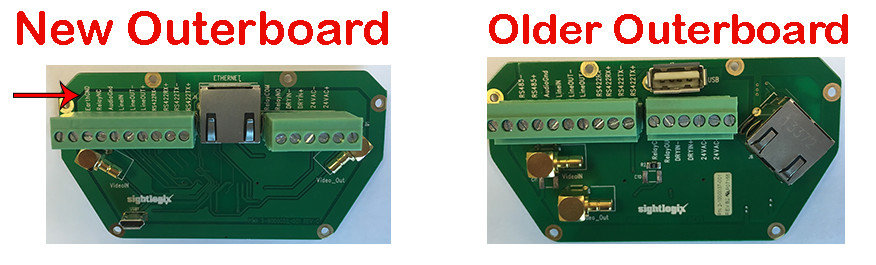
Note: The new SightSensor provides a different IO connector layout with two additional connections. These include EarthGND for Ground Rod connection RelayNC for Form C Dry Contact use, if needed.
We strongly recommended using an Earth Ground; refer to Protecting Your Equipment from Surges).
- Apply power to new SightSensor.
- Verify that you can ping new SightSensor.
- Start SightMonitor and open "Configure" for SightSensor to be replaced.
- Change "Expected Serial Number" from old to new serial number. Press "Save".
- Now connect to SightSensor; the new camera should inherit calibration, zones and rules from old sensor via database.