Tested with Genetec Security Center 5.13.1.0
Tested with SightLogix Firmware 16.2.412
Important Notes
- Please consult the Genetec manuals for detailed operation procedures for SecurityCenter and the Security Desk application.
- The Device Pack 10.6.0 adds a feature that allows Genetec to use only one (1) license per SightSensor, which is especially helpful for dual-imager SightSensors HDs and TCs.
- To add the SightLogix SightTracker PTZ, scroll to the end of this document.
Adding Devices to Genetec with Genetec Protocol
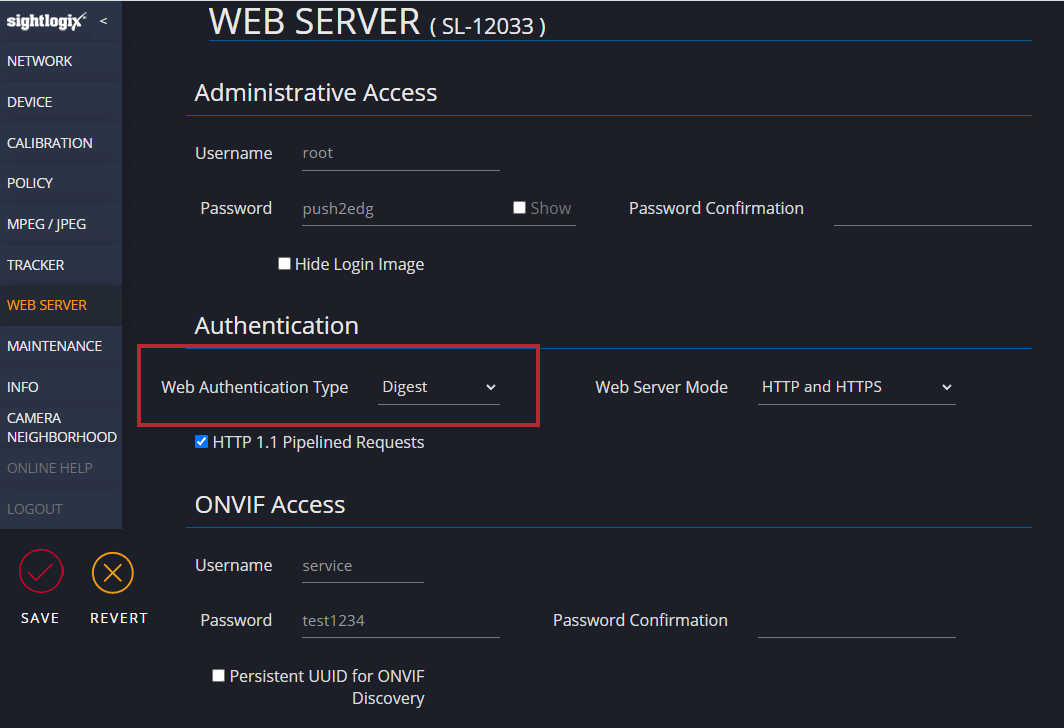
- Devices must be in Digest mode in WebConfig (as shown) before adding devices using the Genetec Protocol.
- Click “Save” and the camera will reboot.
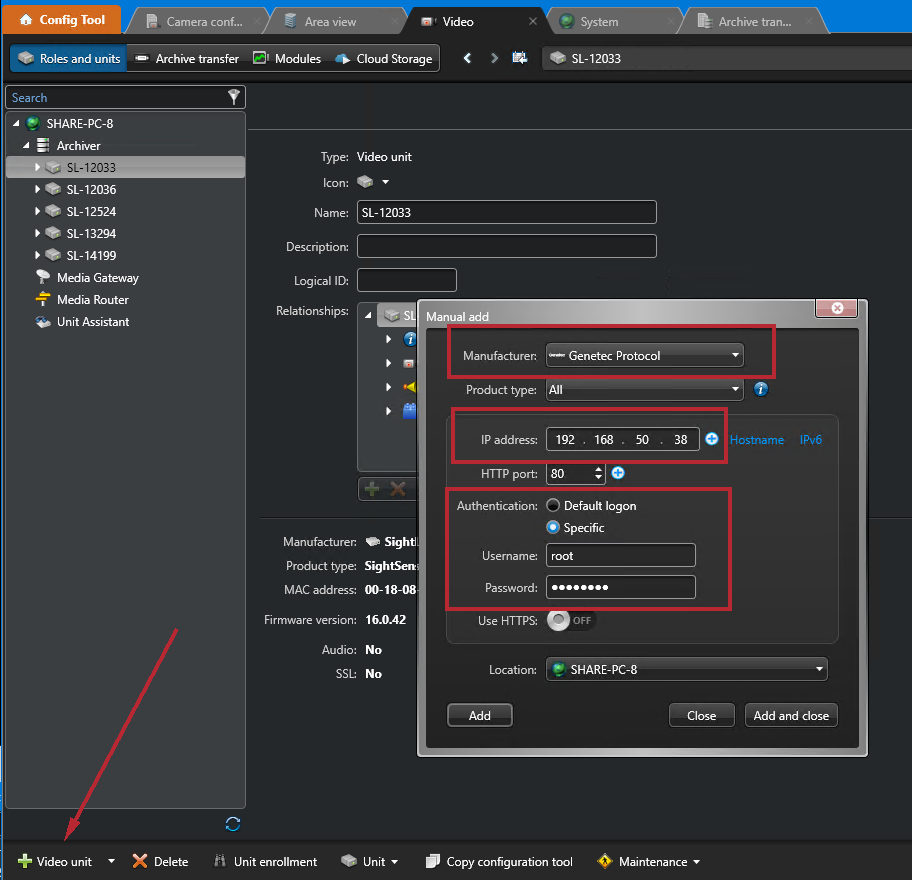
- From the Genetec Config Tool, go to the Video unit viewer and click the appropriate Archiver.
- Select “Video Unit” from the bottom-left menu.
- In the dialog that appears, select “Genetec Protocol” as the Manufacturer.
- Enter the IP address for the camera you are adding.
- Enter the camera username and password (default username is “root”, default password is “push2edg”)
- Click Add (or Add and Close). The device is added to the tree.
Creating Continuous, Scheduled, or Alarm-based Recordings
Once you’ve added cameras, create and configure alarms as follows:
- Expand the unit in the sidebar, select the camera feed you want to record (there will be two feeds for SightSensor HDs and TCs) and then select the Recording tab.
- Under Recording settings select “Custom settings”.
- Under Recording modes select “Continuous”.
- If the device is a dual-imager mode, Repeat the above steps for device on Camera 02. Note that motion is only reported on Camera 01 (the 1080p Visible stream). The Thermal (Camera 02) stream should be set to record continuously.
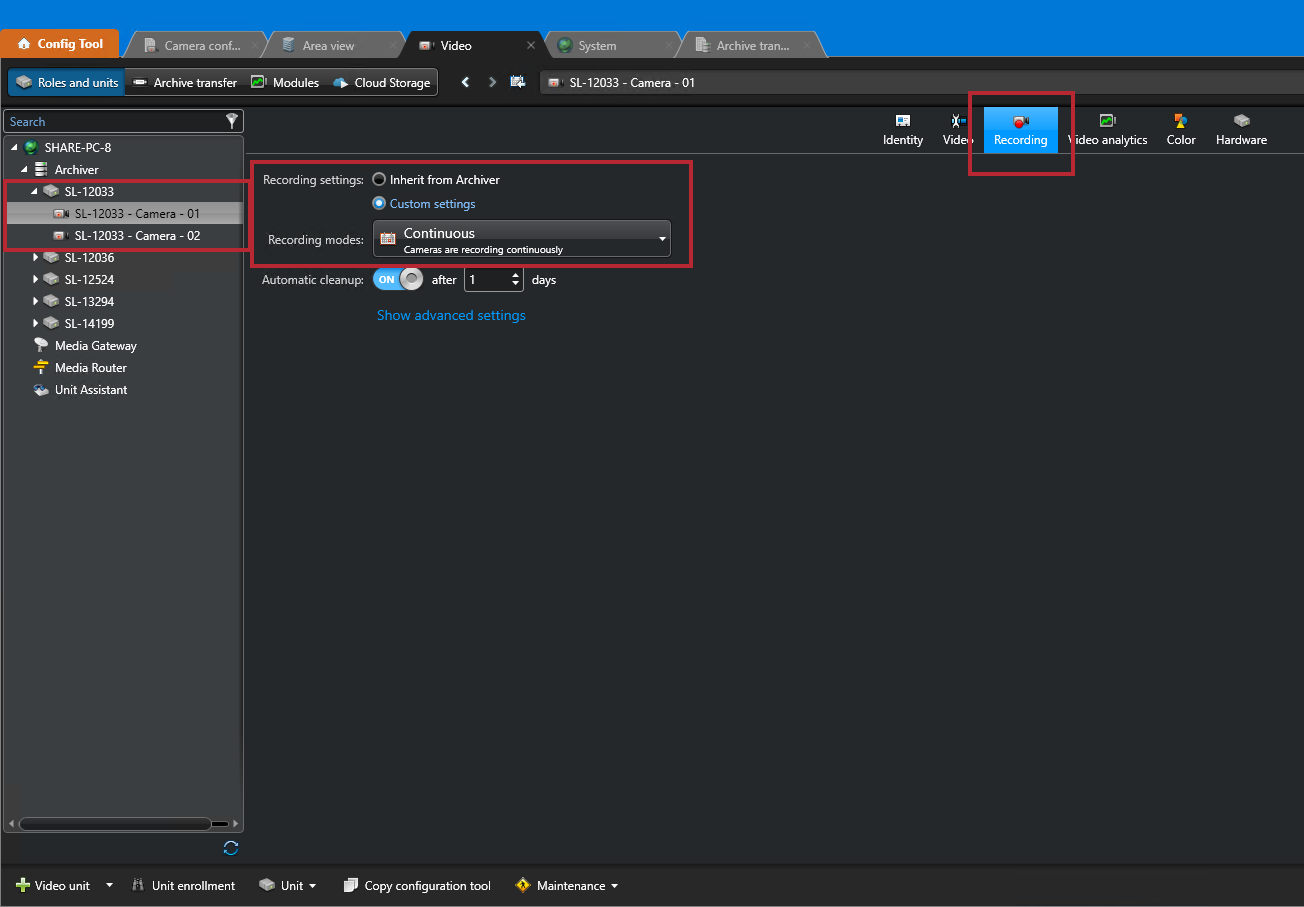
- Click apply on the bottom right to apply the settings

Configure Motion
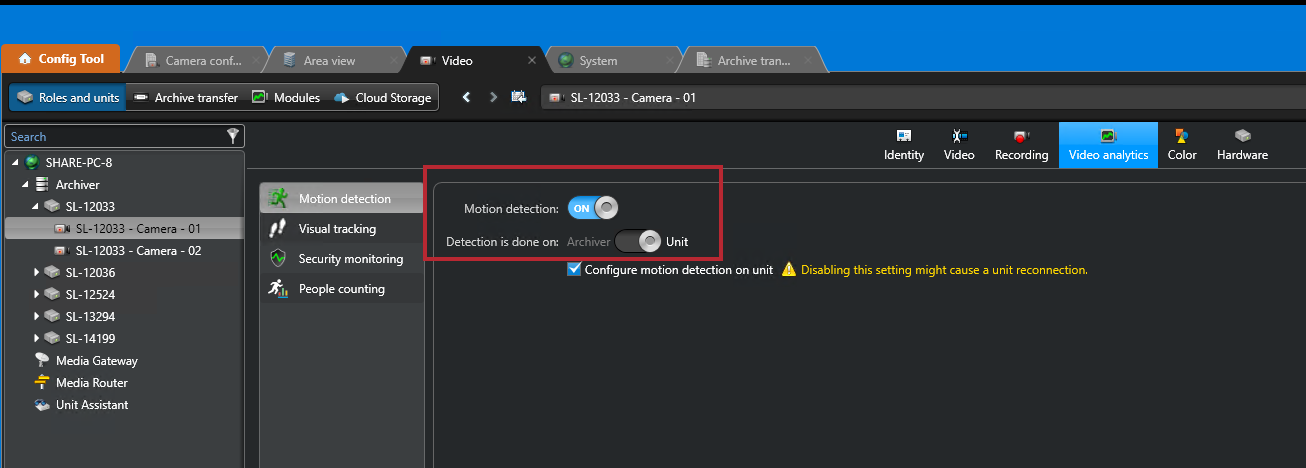
- Select the “Video analytics” tab.
- Click the Motion Detection Tab for each camera feed and verify that motion detection is turned on and detection is done on the unit.
Creating Event Action on Motion Detection
Once you’ve added cameras, create and configure alarm action as follows:
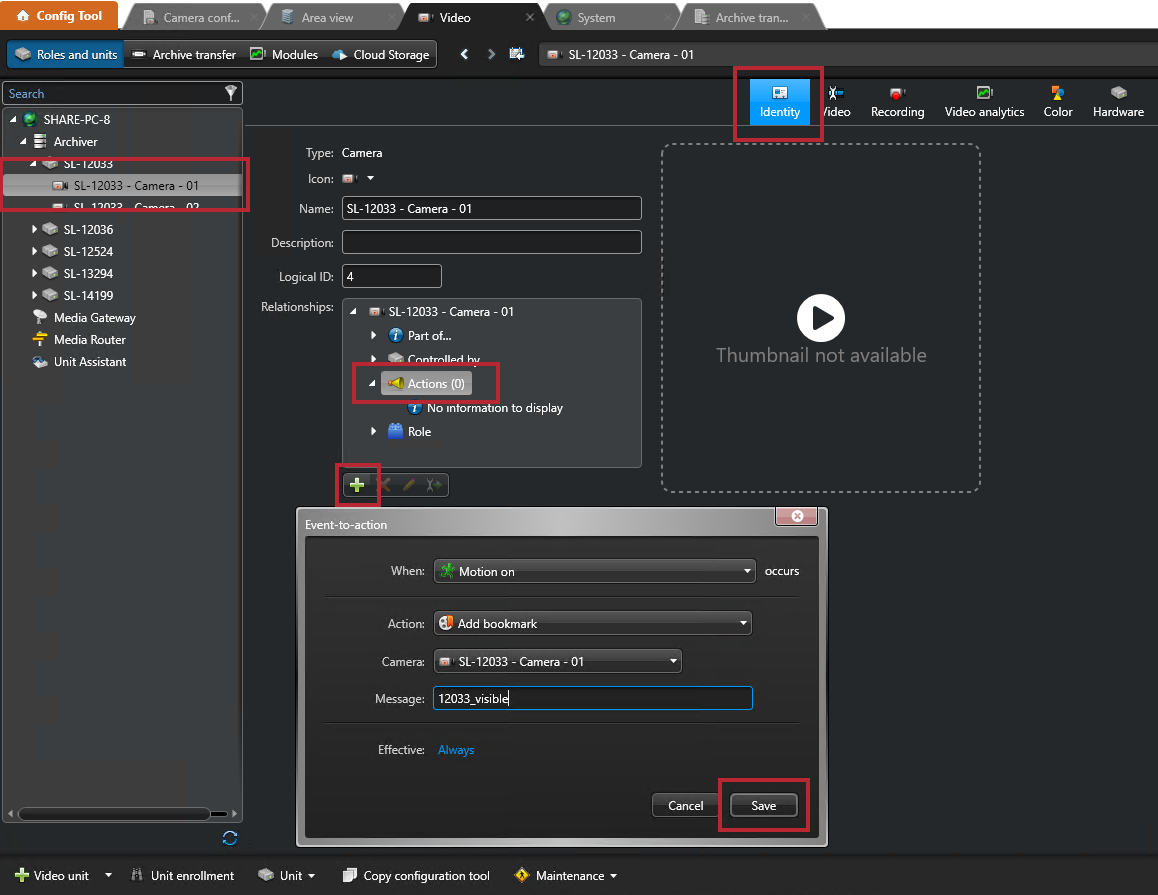
- In the camera view, select the camera feed which you would like an action performed on when motion is detected.
- Click “Identity”
- Click “Actions” Under “Relationships”, and click
- Select “Motion on” as the triggering event
- Select “Add bookmark” as the action to perform
- Select the appropriate camera to apply the action to
- Enter a description for the bookmark event
- Click Save
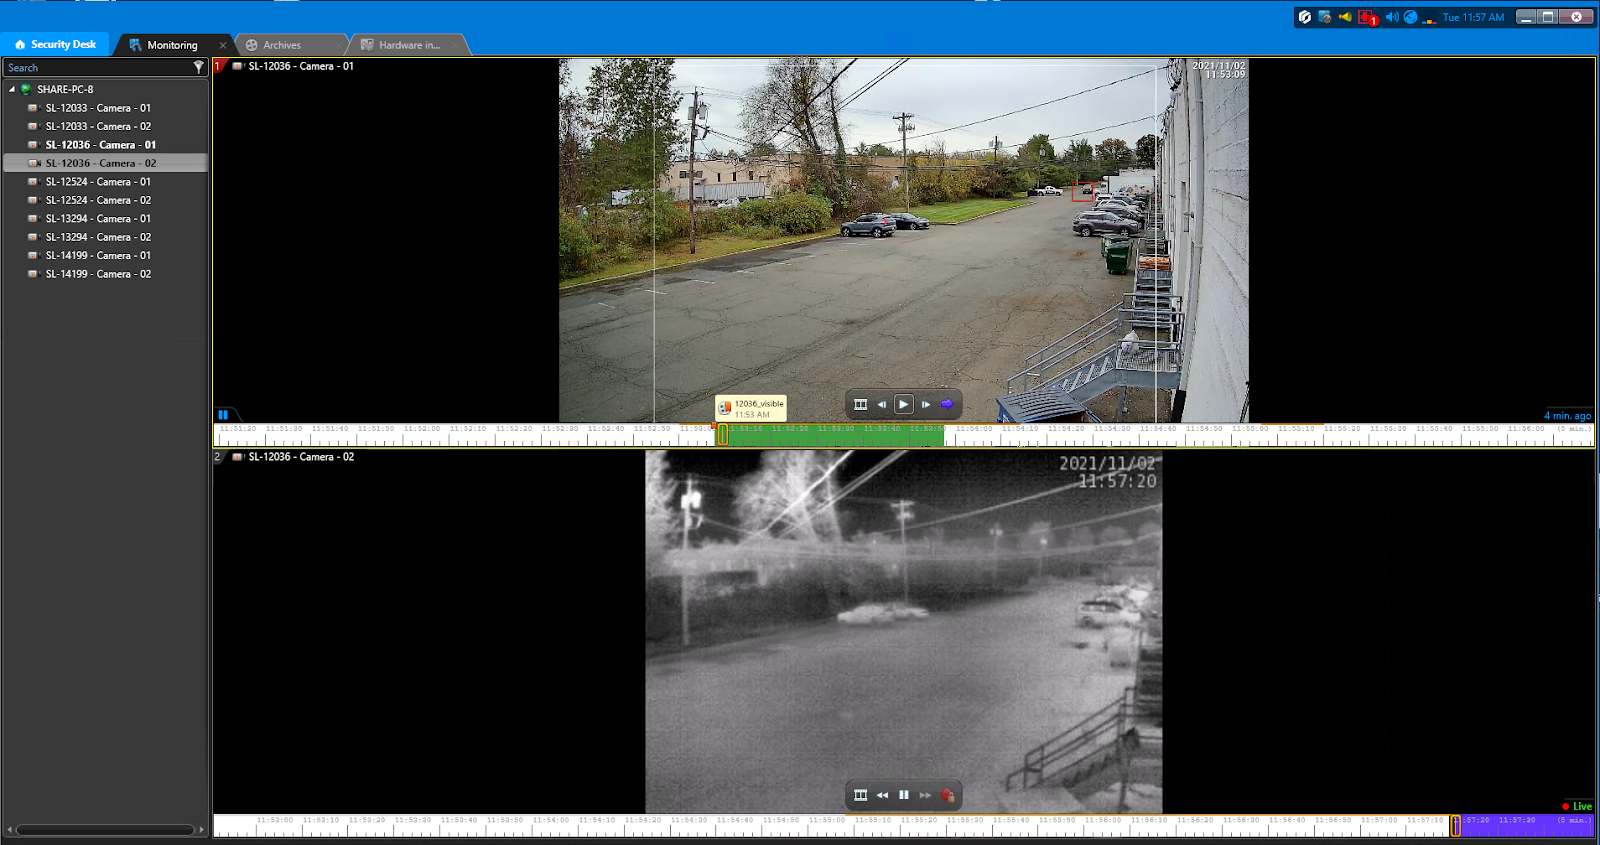
Using Genetec Security Desk
Security Desk is another executable that lets you view live video, playback and bookmarks. To use:
- Launch Security Desk and log in
- Click the monitoring tab
- Click on the cameras and drag them to view
Add SightLogix Devices as an ONVIF Device (Legacy)
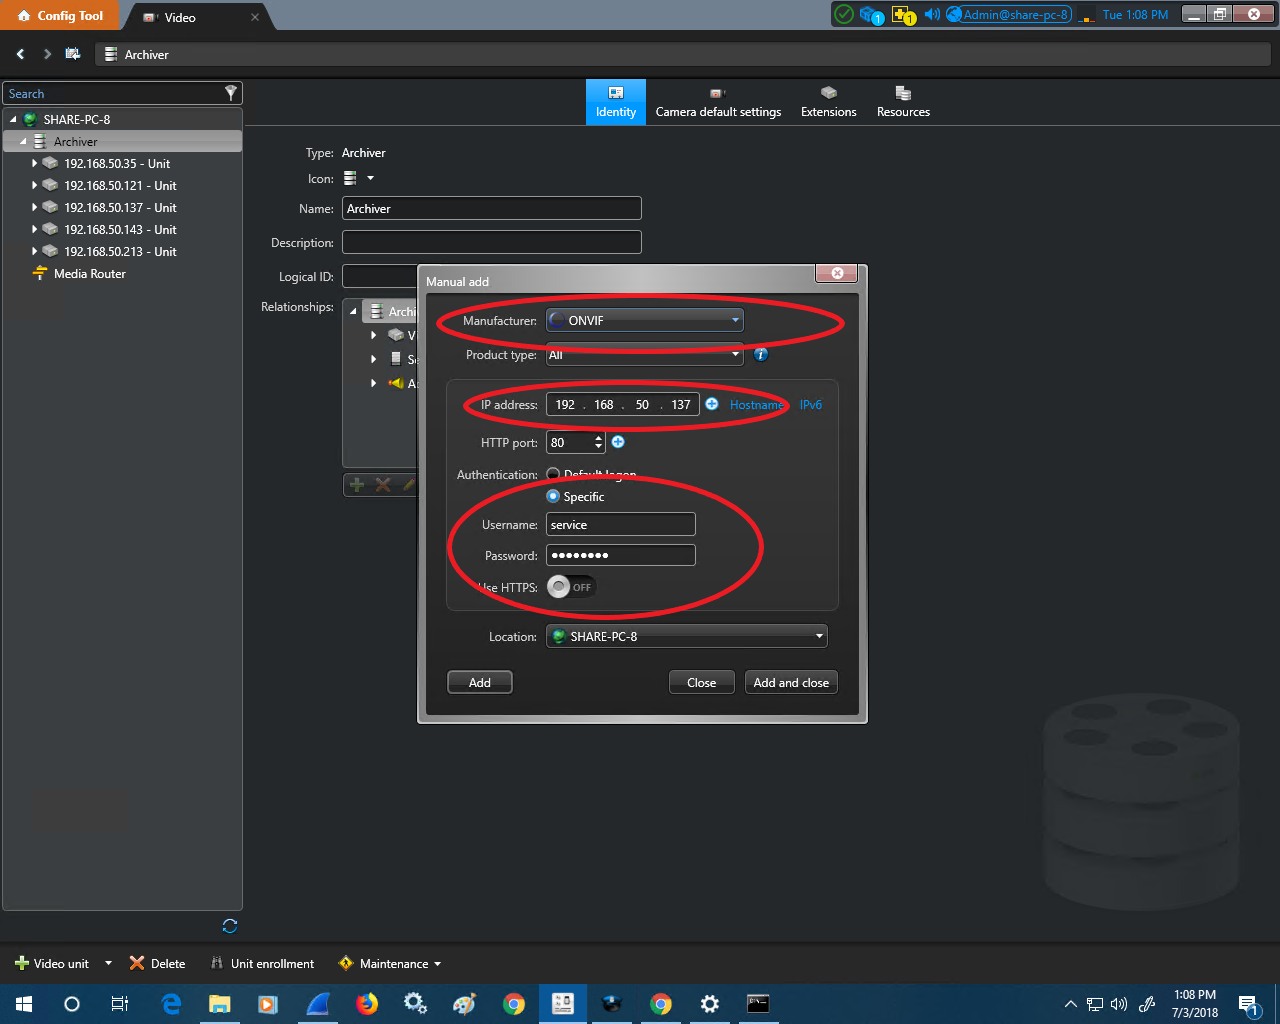
- From the Config Tool, go to the Video unit viewer and click the appropriate Archiver.
- Select “Video unit” from the bottom-left menu.
- In the dialog that appears, select ONVIF as the “Manufacturer.”
- Enter the IP address for the camera you are adding.
- Enter the ONVIF username and password (default username is “service” and the default password is “test1234”).
- Click Add (or Add and Close). The device is added to the tree.
Adding SightTracker PTZ to Genetec
- Add the SightTracker PTZ using ONVIF as the “Manufacturer” (as shown above)
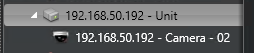
- Once successfully added, the camera unit will have 2 streams, as shown:

- Disable the first stream, as follows (and as shown below):
- Click on camera object
- Go to the “Peripherals” tab
- Click the “Camera - 01” line
- Click on the red circle at the bottom to disable the stream
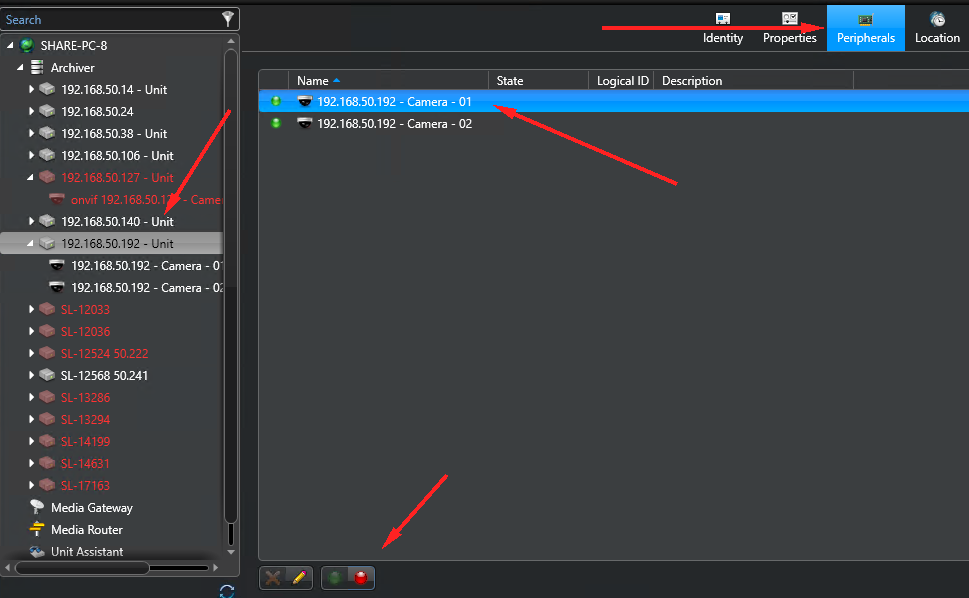
- Click Apply

-
The unit object will now have 1 stream, as shown
- All video / alarm events directions will be set up as explained in "Creating Continuous, Scheduled, or Alarm-based Recordings", above.
-
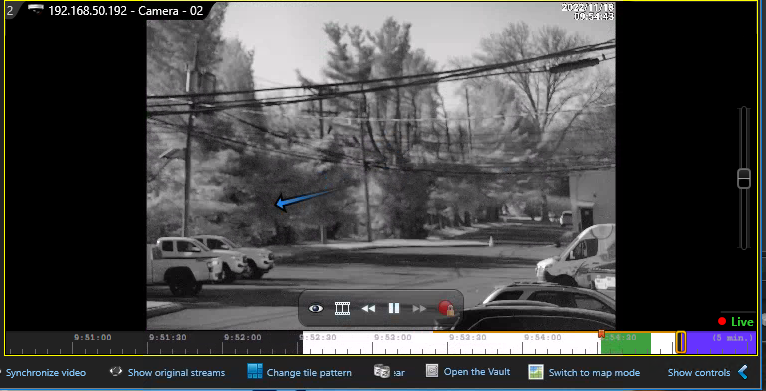
You may manually navigate the SightTracker PTZ in the Genetec Security Desk by doing the following:
-
Drag the live video screen to pan and tilt the camera
-
Use the mouse scroll or the side handle bar to zoom in and out
-
