Tested with Milestone 2022 R2 Corporate
Tested with SightLogix Firmware 16.2.192
Add SightLogix Devices as an ONVIF Device
Note: Milestone 2020 R3 and above does not work with the default ONVIF username/password.
- Instead, configure the ONVIF username and password via WebConfig (or SightMonitor/CS) and enter the credentials below when adding the camera.
- Do not use or set username/password to service/test1234

Adding Devices Using SightMonitor
If you are using SightMonitor to manage your SightLogix device, follow these steps. If you are using WebConfig, scroll to the next section.
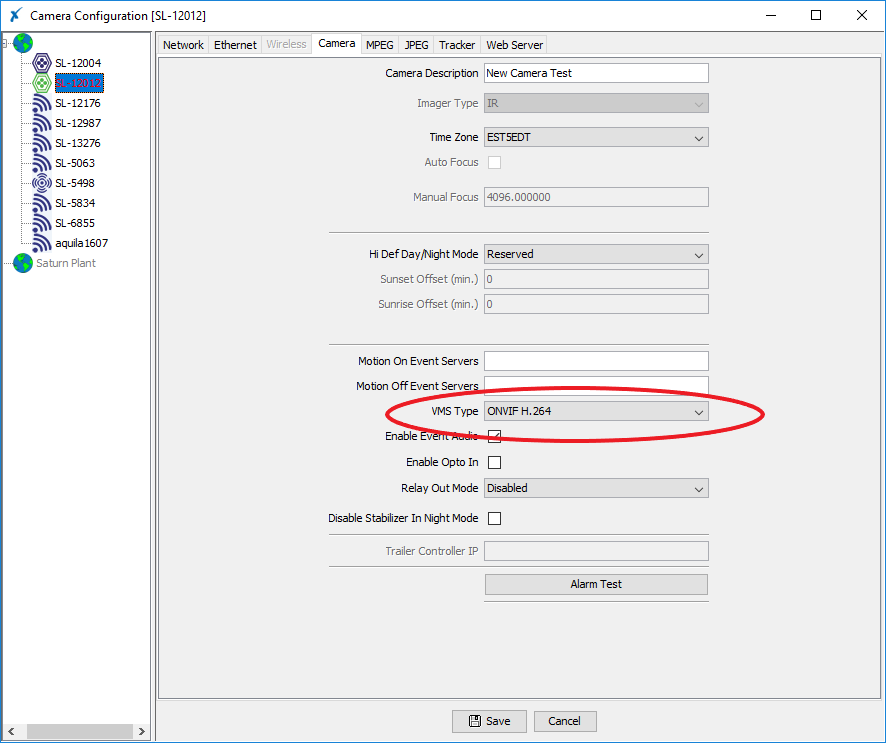
- In SightMonitor, right-click your device, click Configure, choose the Camera tab, and set the VMS Type to either ONVIF H.264 (preferred) or ONVIF MPEG4.
Adding Devices Using WebConfig
If you are using WebConfig to manage your SightLogix device, do the following.
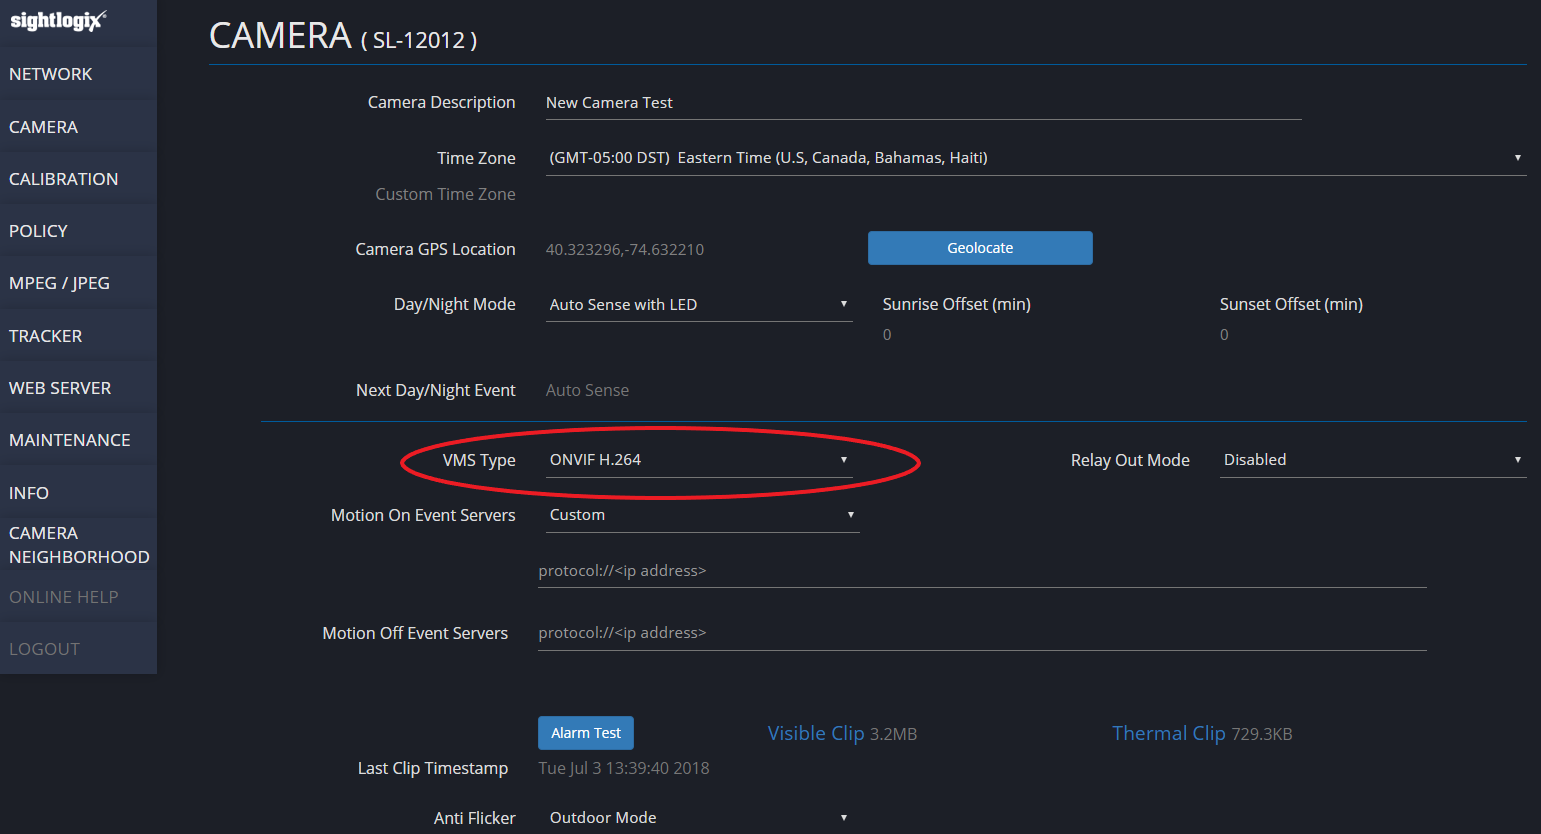
- In WebConfig, go to the Camera tab and set VMS Type to either ONVIF H.264 (preferred) or ONVIF MPEG4
Now that the VMS type has been set in either SightMonitor or Webconfig, you next add devices to Milestone as hardware units.
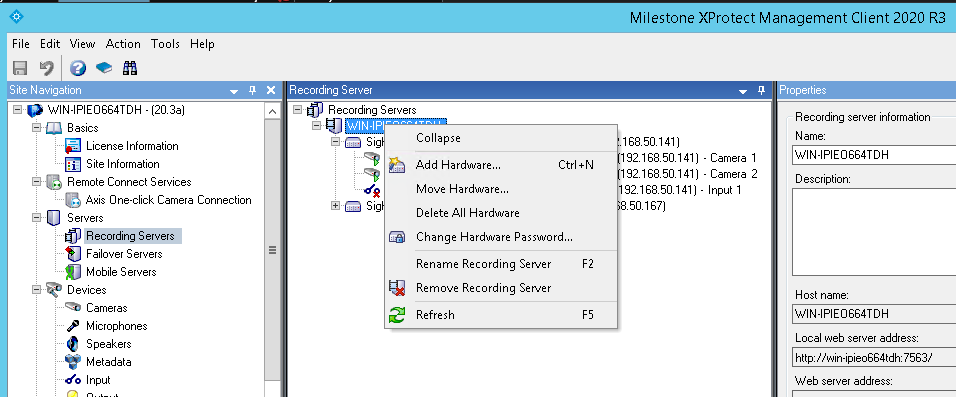
- From the Milestone Xprotect Menu Tree, select Recording Server on left, then right-click on the VMS server in the middle panel and select “Add Hardware”, as shown.
- Select Manual and click next, as shown.

- The Add Hardware window opens, as shown. Click Next.

- Select ONVIF, and click Next.

- Type in the camera IP address. Click Next.

- XProtect will detect the hardware. Click Next.

- XProtect will collect Camera Info. Click Next.

- Keep all default settings and click Next.

- Select and add to group, as shown.

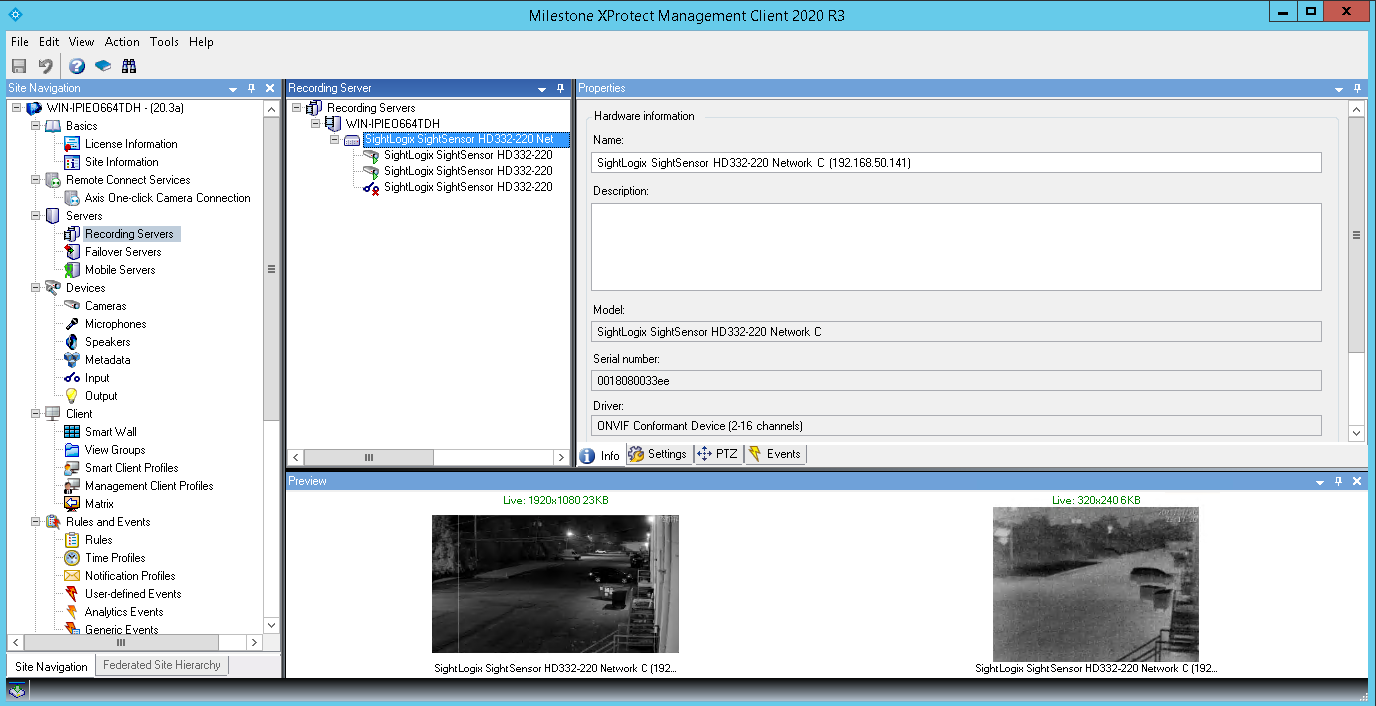
- Click Finish. A successfully added camera appears as shown. If you have a SightSensor HD, the visible and thermal sensors will be added as two cameras from the same IP address.
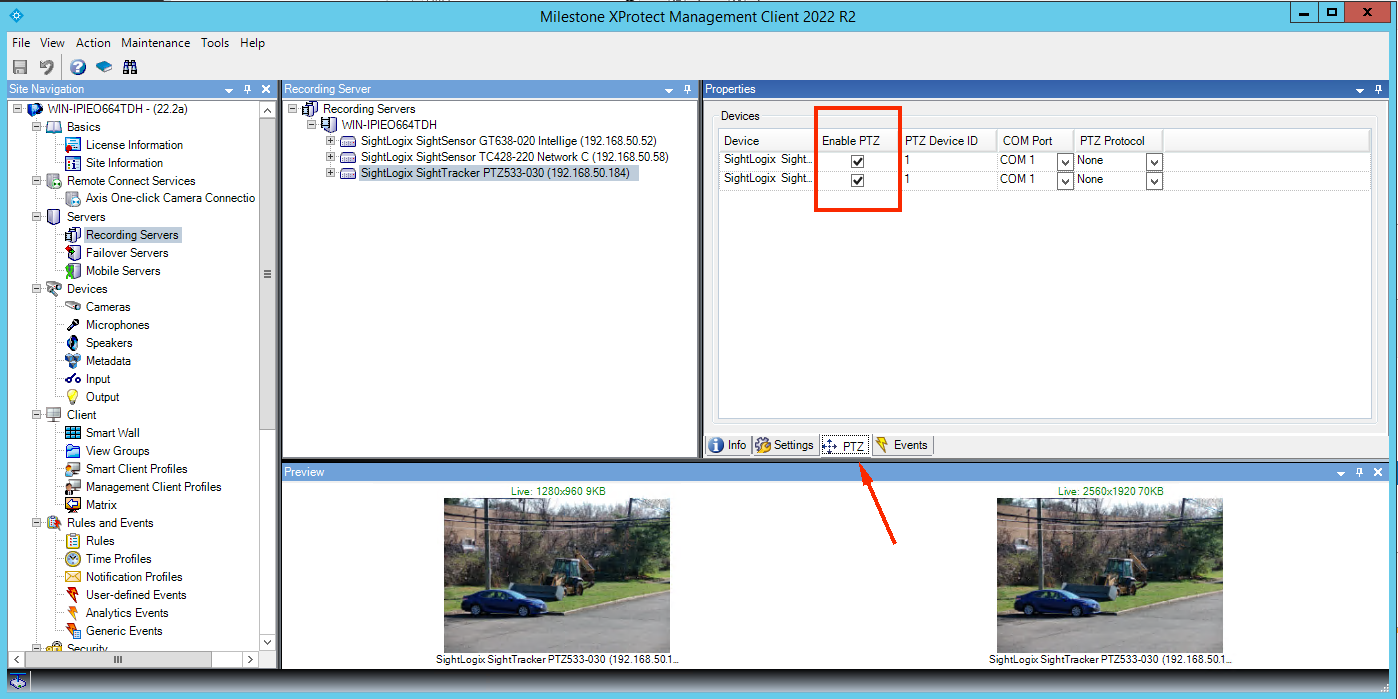
Adding PTZs to Milestone
For PTZ’s, check the “Enable PTZ” checkbox to control the PTZ in the XProtect Client.
Setting Alarms
Once you’ve added cameras, create and configure alarms as follows.
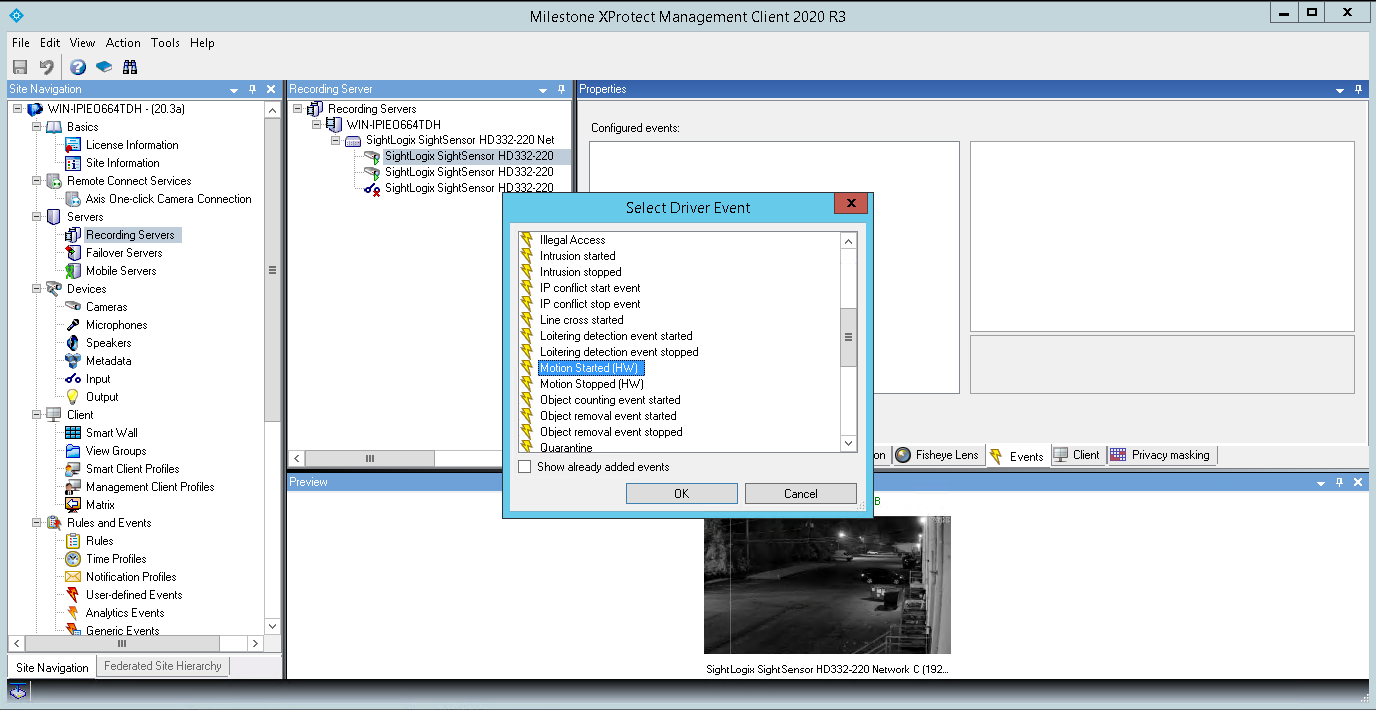
- Select Recording Server ->Camera -> Event tab.
- Add Motion Started/Motion Stopped event, as shown.
- Click Save
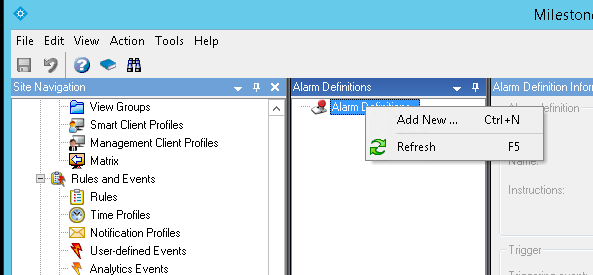
- Go to Alarm Definitions under Alarm on left-side navigation menu.
- Right Click Alarm Definitions in the middle panel and choose Add New.
- In the Properties Table, select Device Events under Triggering event, select Motion Started Driver, and click the Select button to select the camera which will send the alarm.
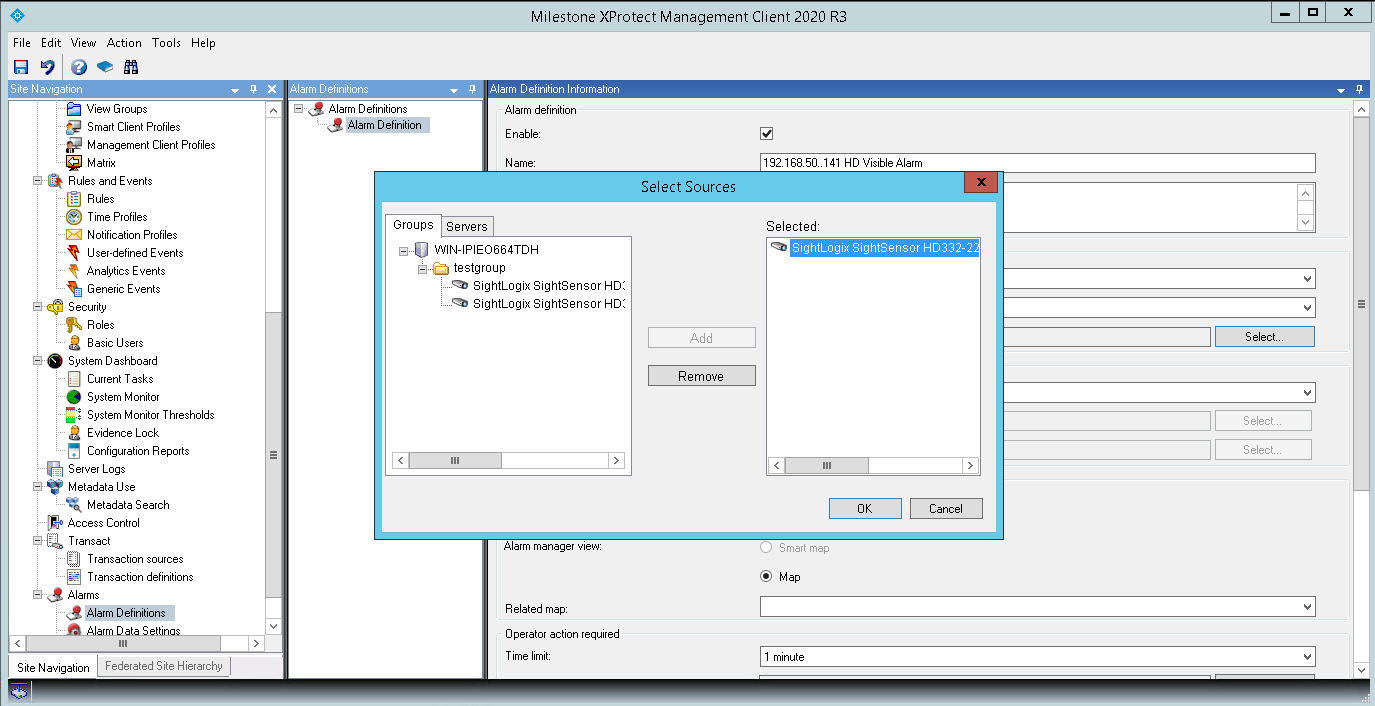
- Click Save.
- You may also use Rules in the left menu panel to create actions, for example, to start recording when an alarm is triggered.
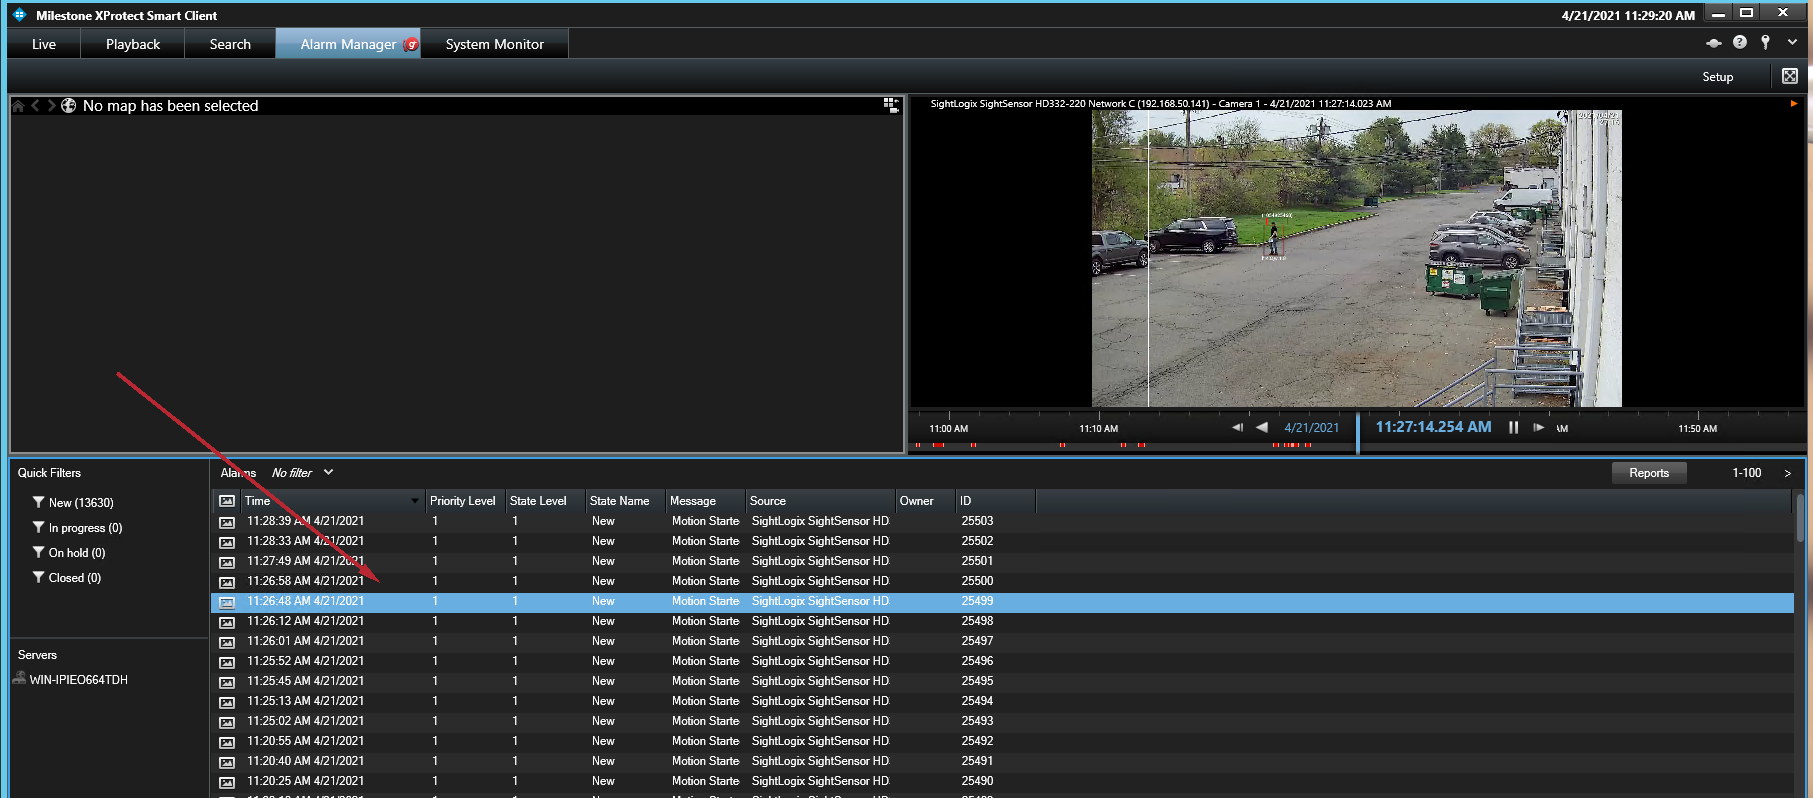
- When an alarm is triggered, you should see alarms under Alarm Manager in Smart Client, as shown.