Tested with Avigilon Control Center 7.2.0.18
Tested with Avigilon Control Center 7.14.34.4

Tested with SightLogix Firmware 15.12.7
Tested with SightLogix Firmware 16.2.232
Add SightLogix Devices as an ONVIF Device
Adding Devices with SightMonitor
If you are using SightMonitor, follow these steps. If you are using WebConfig, scroll to the next section
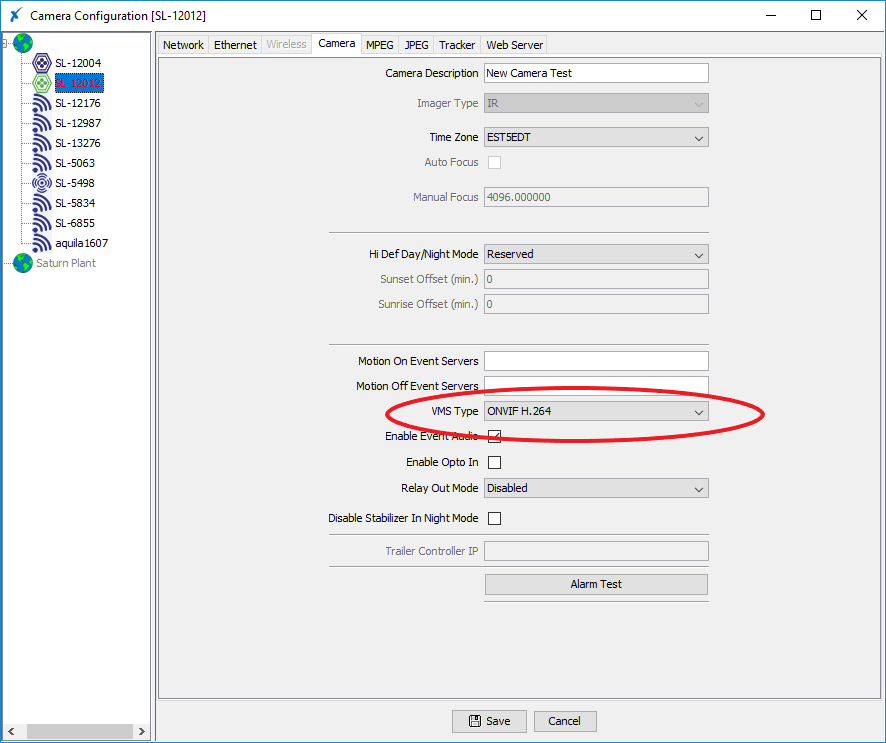
- In SightMonitor, right-click your device, click Configure, choose the Camera tab, and set the VMS Type to either ONVIF H.264 (preferred) or ONVIF MPEG4.
- Select VMS Type None if the device is an AXIS camera.
-
Adding Devices with WebConfig
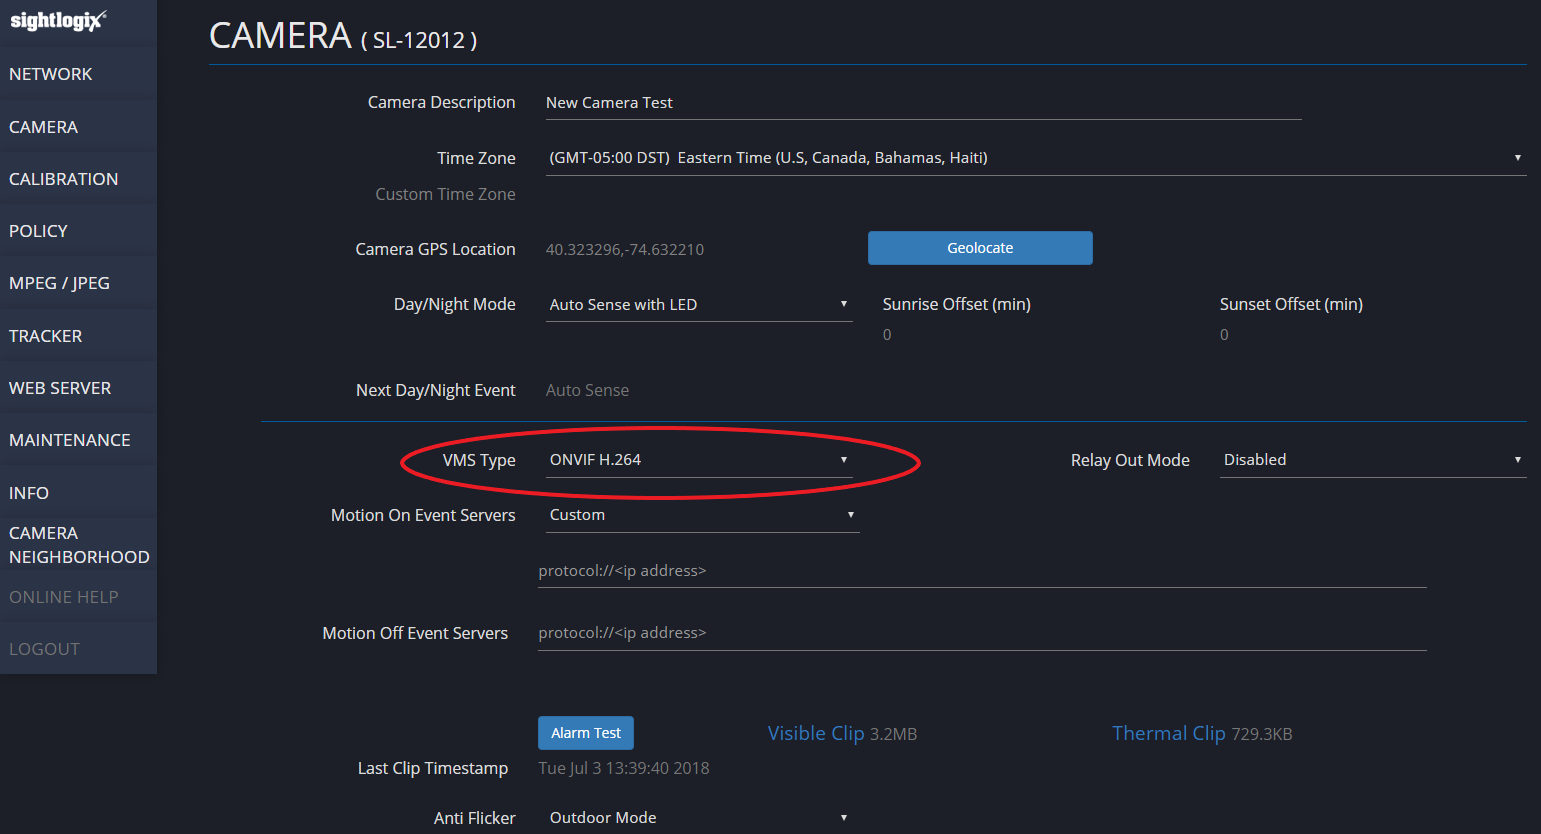
- In WebConfig, go to the Camera tab and set VMS Type to either ONVIF H.264 (preferred) or ONVIF MPEG4.
- Select VMS Type None if the device is an AXIS camera.
- In WebConfig, go to the Camera tab and set VMS Type to either ONVIF H.264 (preferred) or ONVIF MPEG4.
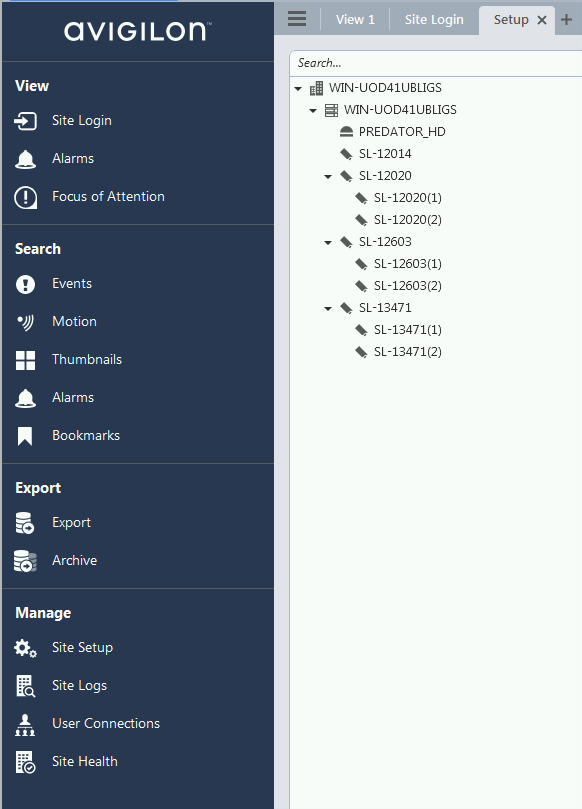
Next, add devices individually as hardware units.
- Log into Avigilon Control Center, click the upper left menu icon (three bars) and select Site Setup from Manage section in the left-side navigation.
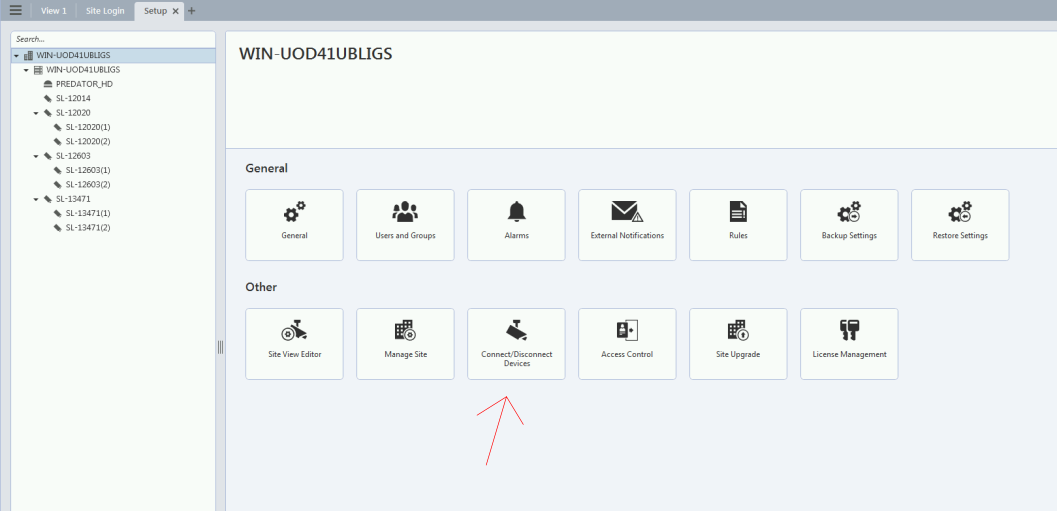
- Select your site and click Connect/Disconnect Devices.
- Look for your camera in the “Discovered Devices” interface.
- Click Find Device if your camera is not found and enter the SightLogix camera’s information in the Find Camera window and click OK.
- Camera type is ONVIF.
- Username/password is service/test1234
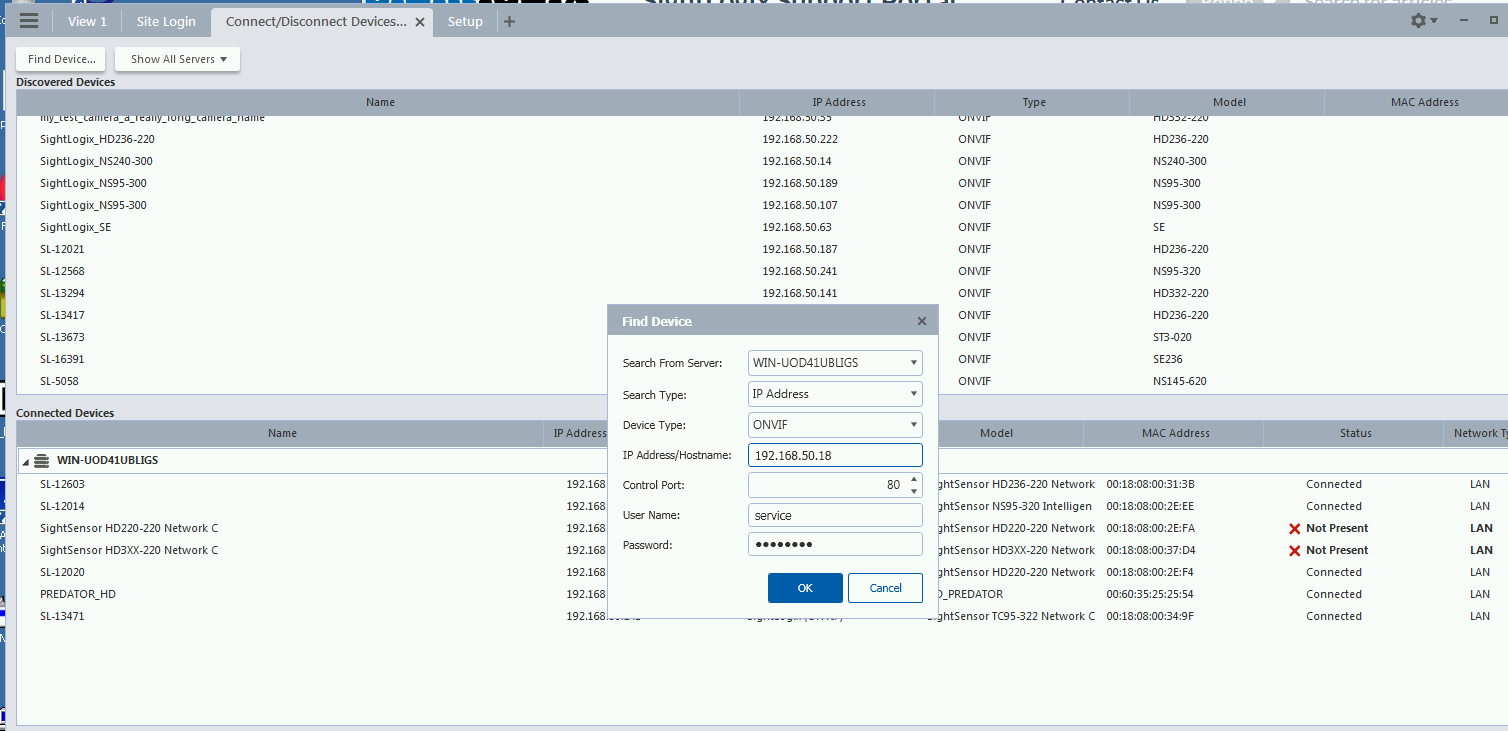
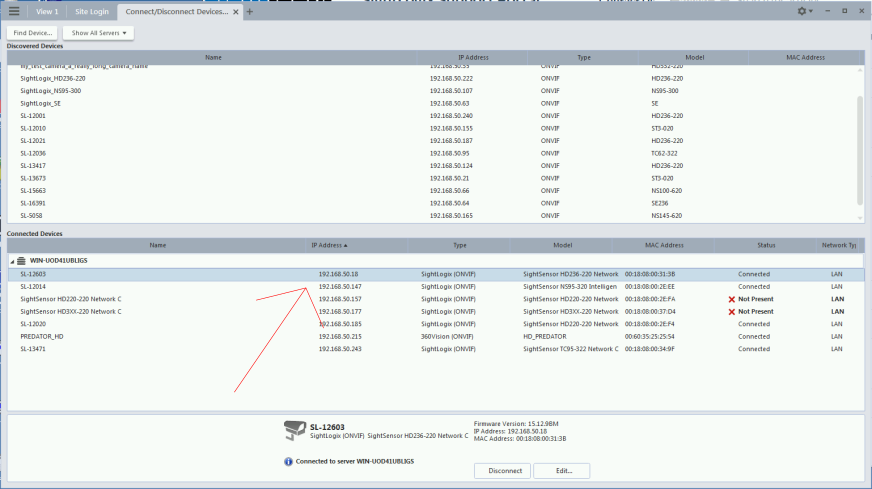
- Select your camera, click ‘Connect…” and Press OK.

- Once connected, the camera will be shown at the bottom under Connected Cameras.
Enable Camera Recording
Make sure site is set to continuous recording for playback mode.
- Go to the site setup menu, click on the site and go to the “Recording Schedule” tab.

- Click the “Set Area” and drag the bar to set the recording schedule.

Setting Alarms
Once you’ve added cameras, create and configure alarms as follows:
- Under the setup menu, click Alarms and click Add.

- Select Motion Detection under Alarm Trigger Source.
- Select the camera which you want to associate with this alarm.
- Click Next.
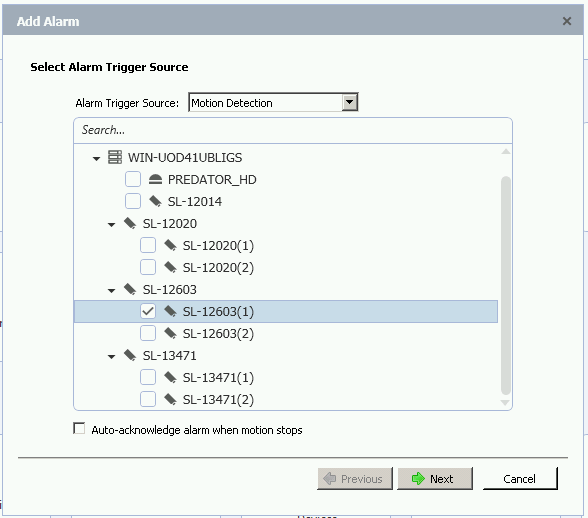
- Select the camera again to link the alarm to your camera and then click Next.

- Add the group/user to receive the alarm notification.
- Click ‘Next’

- Click ‘Next’ on alarm acknowledgement action.

- Provide alarm name.
- Click Finish.
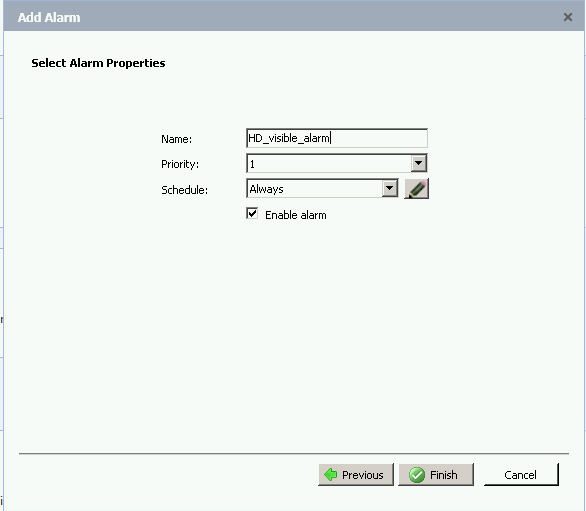
After adding the alarm, the Alarm properties should look as follows:

Setting Rules
After you’ve added alarm settings, you may add rules to perform an action (e.g. add Bookmark) when an alarm triggers.
- From the Setup window, click Rules
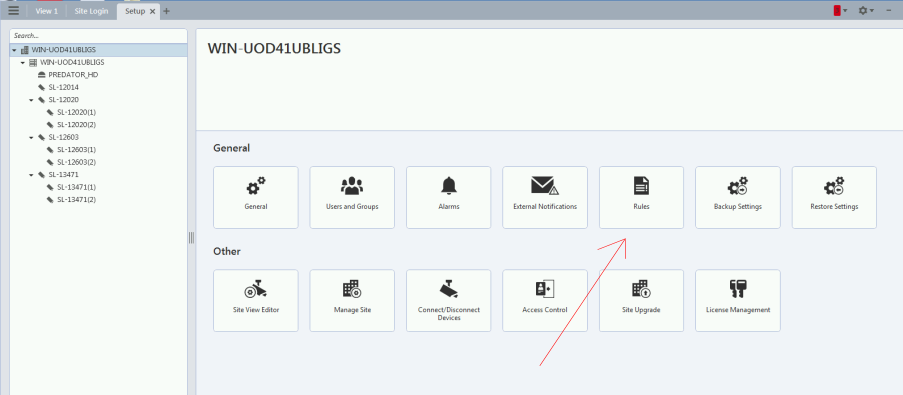
- Select Motion detection started, then Next.

- Select Create Bookmark as the action.
- Click "any camera" to select the SightLogix device.

- Click Next.
- Review your rule setup at the bottom of the window and click Next.

- Provide a name and click Finish.
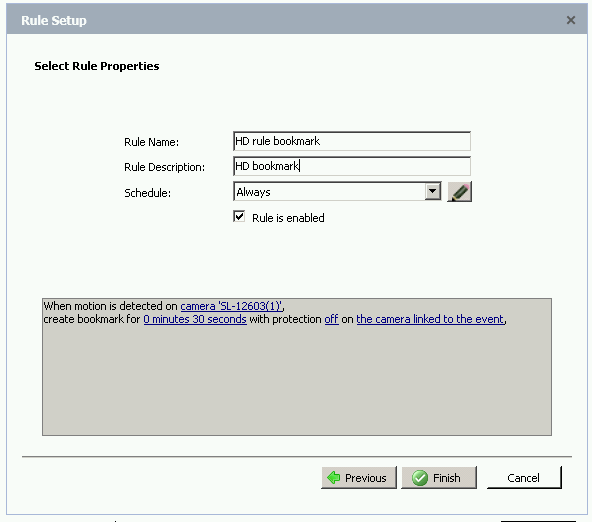
- Check rule description

-
Check the alarms under Search -> Alarms/Motion/Events


