Adding SightLogix to Exacq as an ONVIF Device
Tested with Exacq server version 21.03.10.0
Tested with Exacq client version 21.03.4.0 (x64)
Tested with SightLogix Firmware 16.2.92
- *Note: Exacq-SightLogix ONVIF integration was broken as of Exacq server version 9.8.5 and is repaired with the unreleased server version 19.12.106.0, which can be obtained via request to Exacq. These fixes are expected to be released in Exacq version 20.03 in March 2020 (new versions require SightLogix firmware 15.12.135 and 10.10.84, which is backwards compatible with Exacq 9.2.3).
Adding Devices with SightMonitor
If you are using SightMonitor, follow these steps. If you are using WebConfig, scroll to the next section.
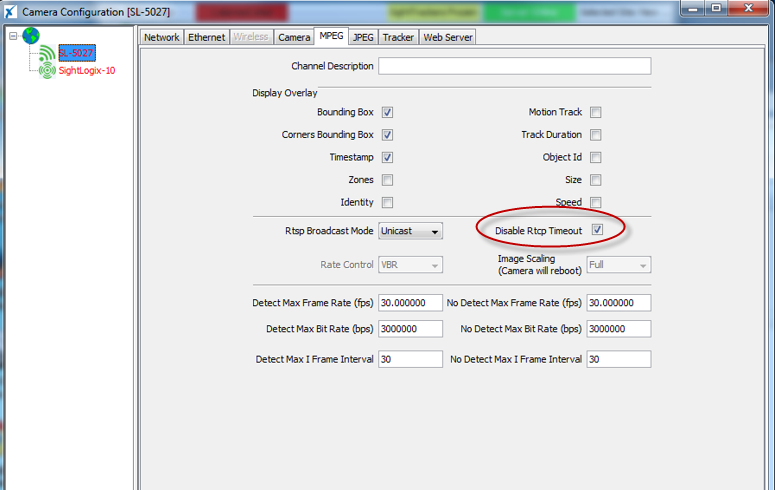
- In SightMonitor, right-click your device, click Configure, choose the Camera tab, and set the VMS Type to either ONVIF H.264 (preferred) or ONVIF MPEG4.

- Click the MPEG tab and check the "Disable RTCP Timeout" checkbox.
Adding Devices with WebConfig
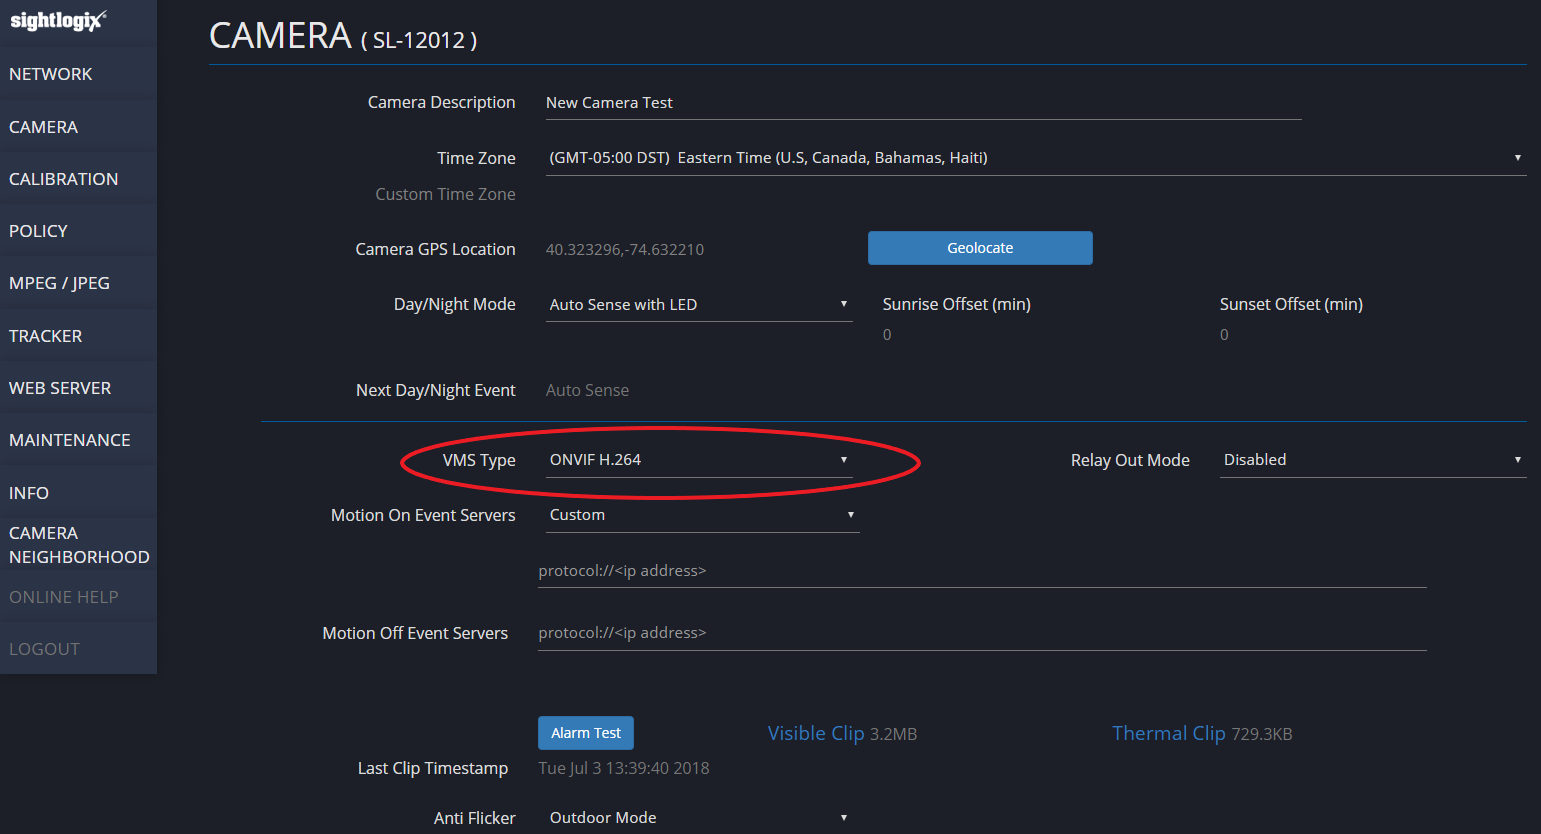
- In WebConfig, go to the Camera tab (or Device tab) and set VMS Type to either ONVIF H.264 (preferred) or ONVIF MPEG4.
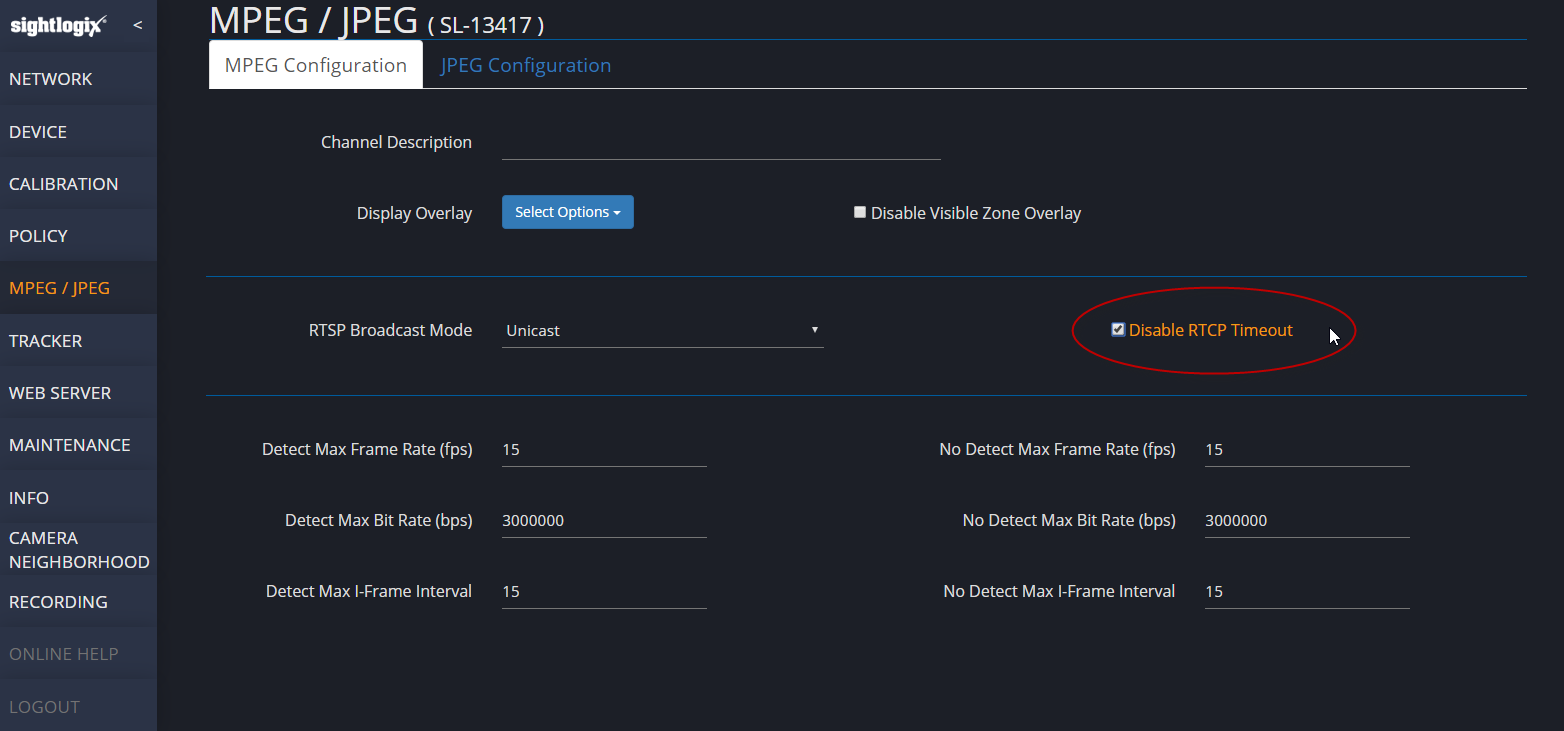
- Click the MPEG tab and check the "Disable RTCP Timeout" checkbox.
Adding Cameras

- On the Tree view, click on ‘Add IP Camera’.
- Click New.
- Device Type: ONVIF
- IP: Your IP address
- Username: service
- Password: test1234
- Click Apply
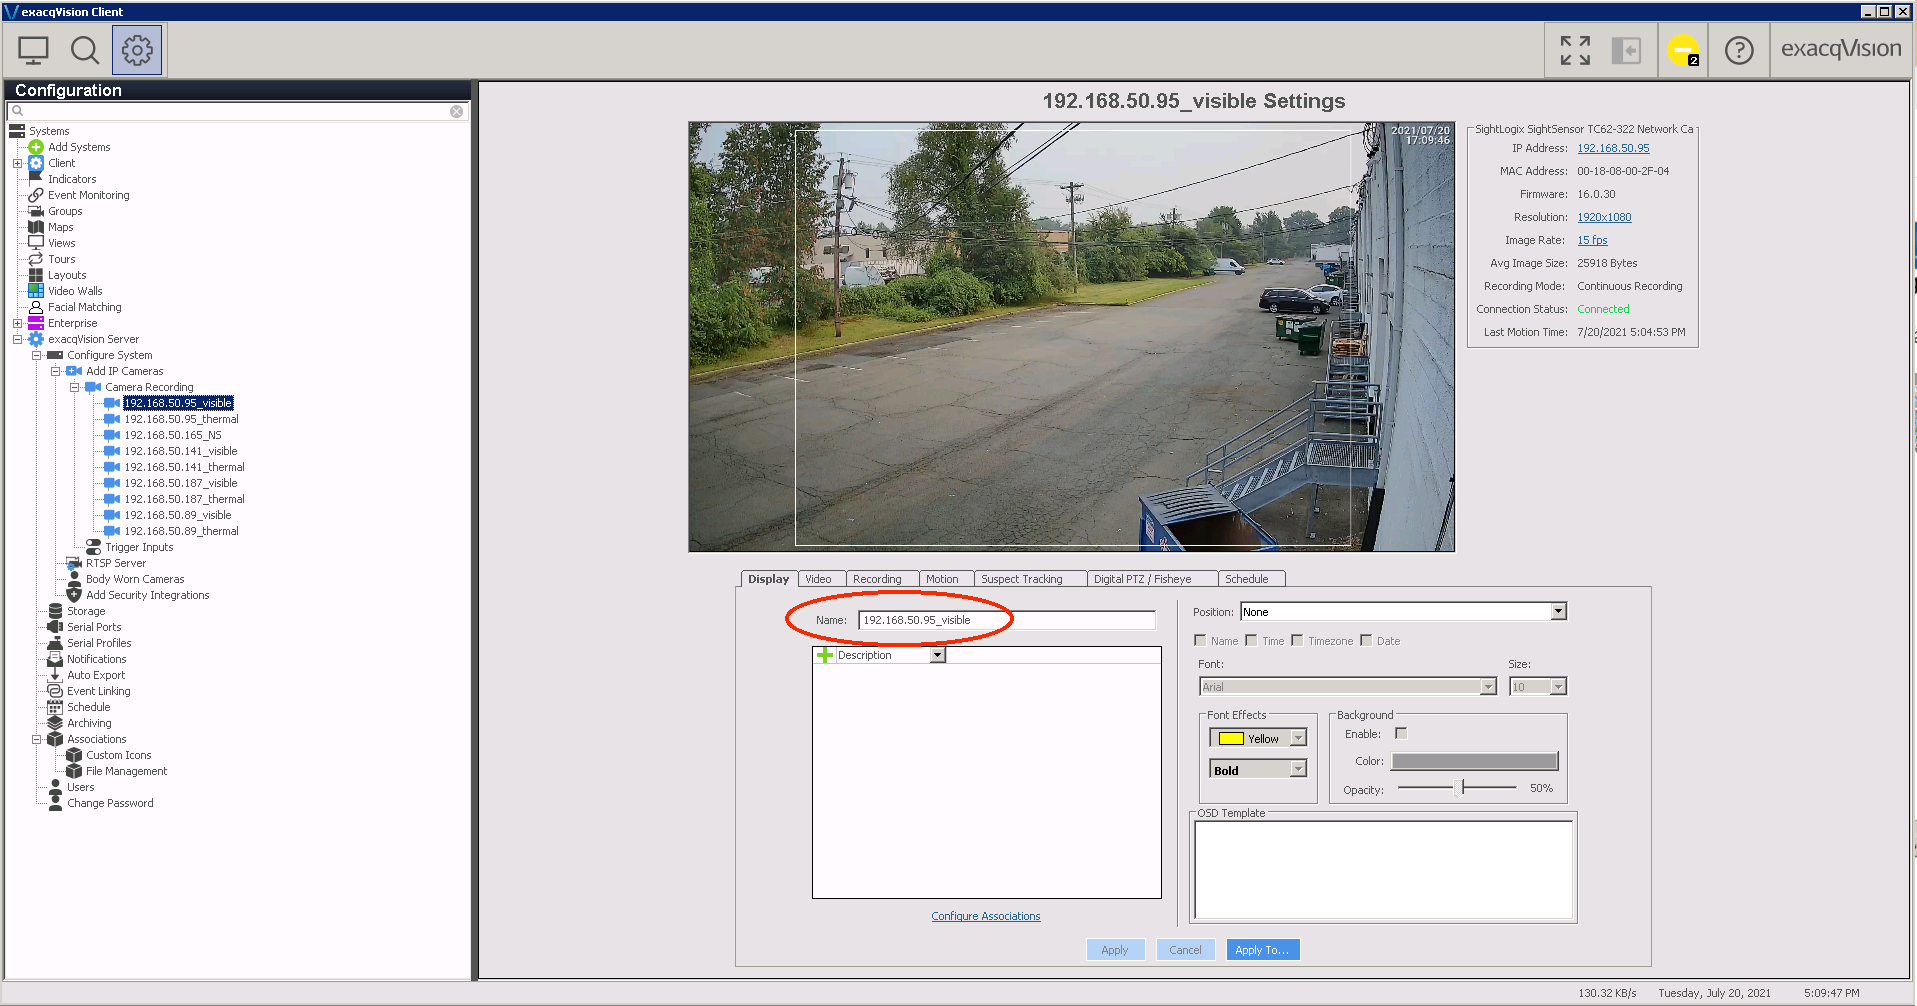
Configuring Camera Settings
- In the Tree view, under camera recording, click your camera to go to the camera’s settings page.
- In the device tab, rename camera to your choice.
- In the schedule tab, highlight all the boxes and set them to green (Free Run) - this enables continuous recording for playback.
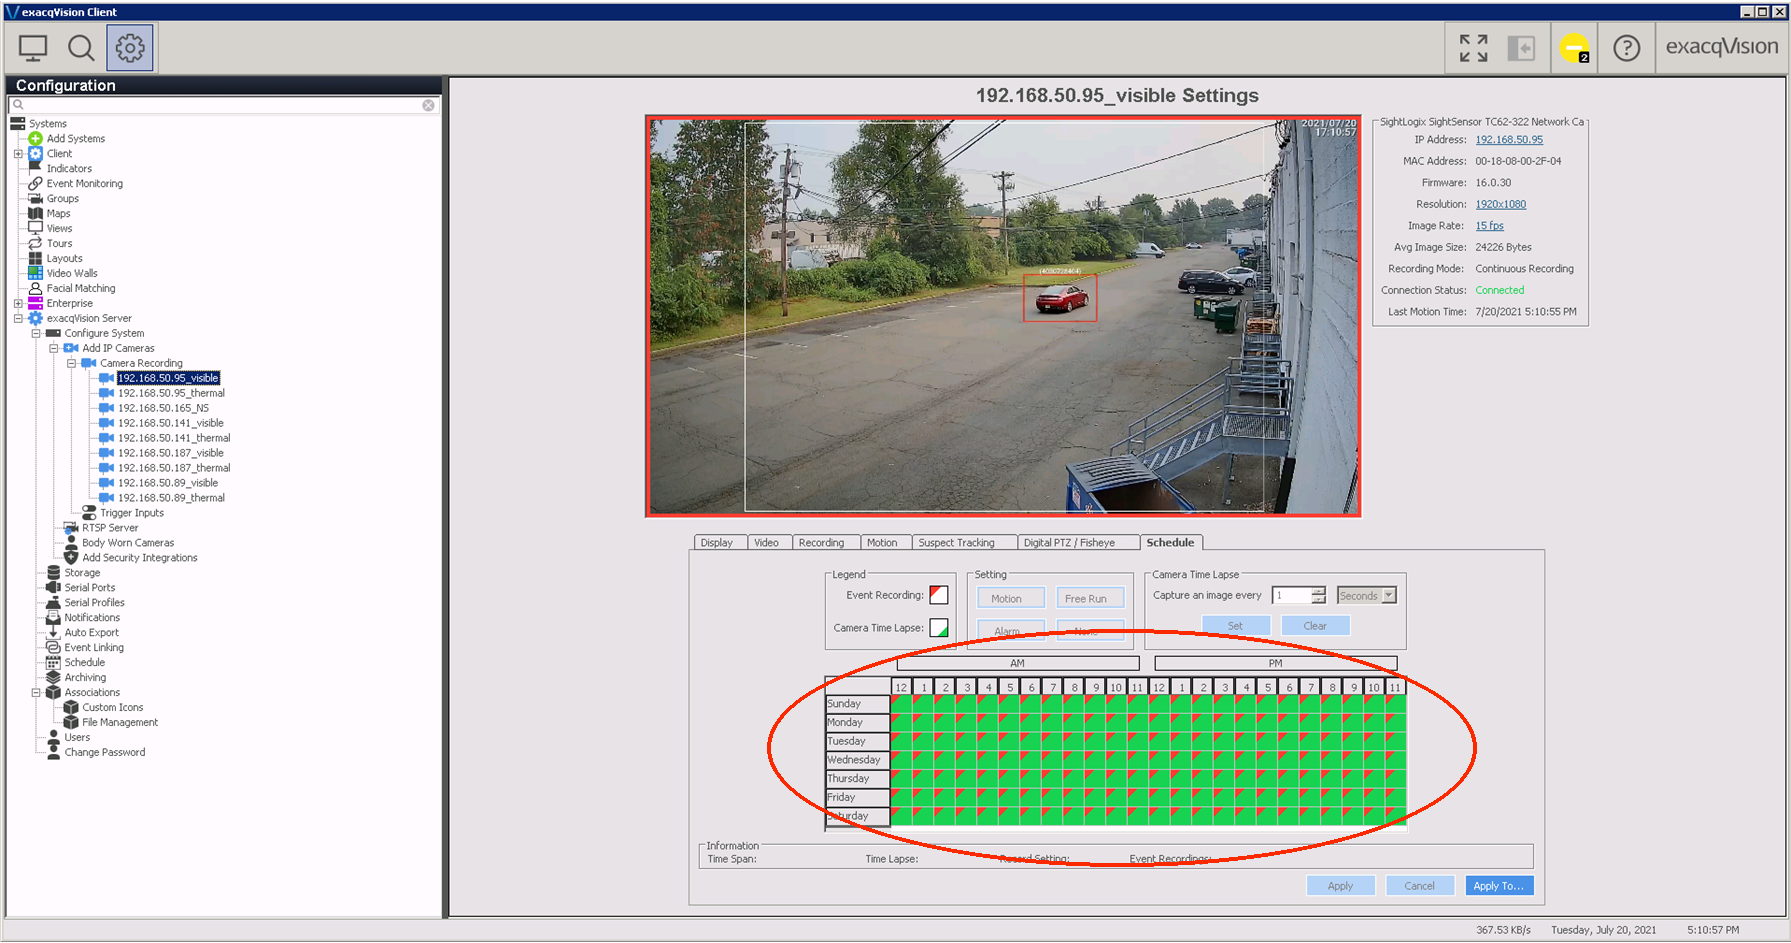
- Click apply after each change.
Set Up Event Linking
- In the Tree view, click “Event Linking” and "New".
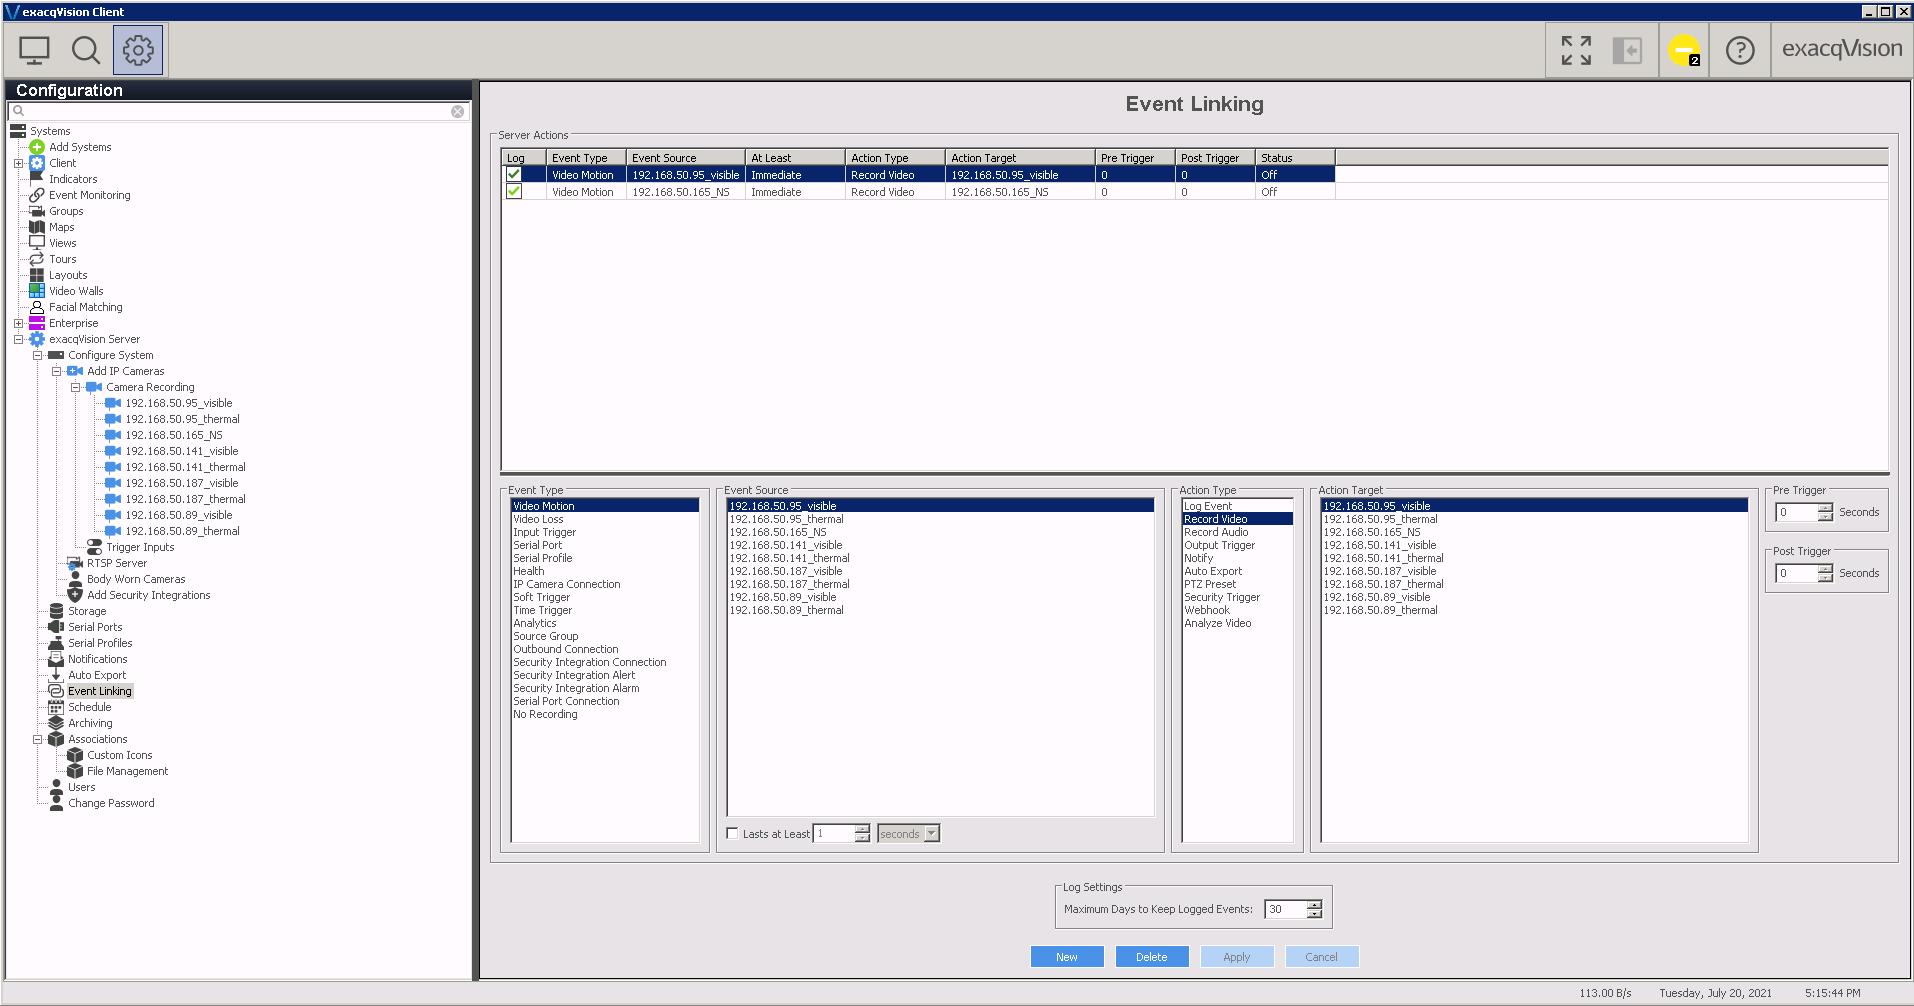
- Event Type: Video Motion
- Event Source: Your camera’s name
- Action Type: Record Video
- Action Target: Your camera’s name
- Set Pre / Post trigger to determine how long the alarm should last in the timeline
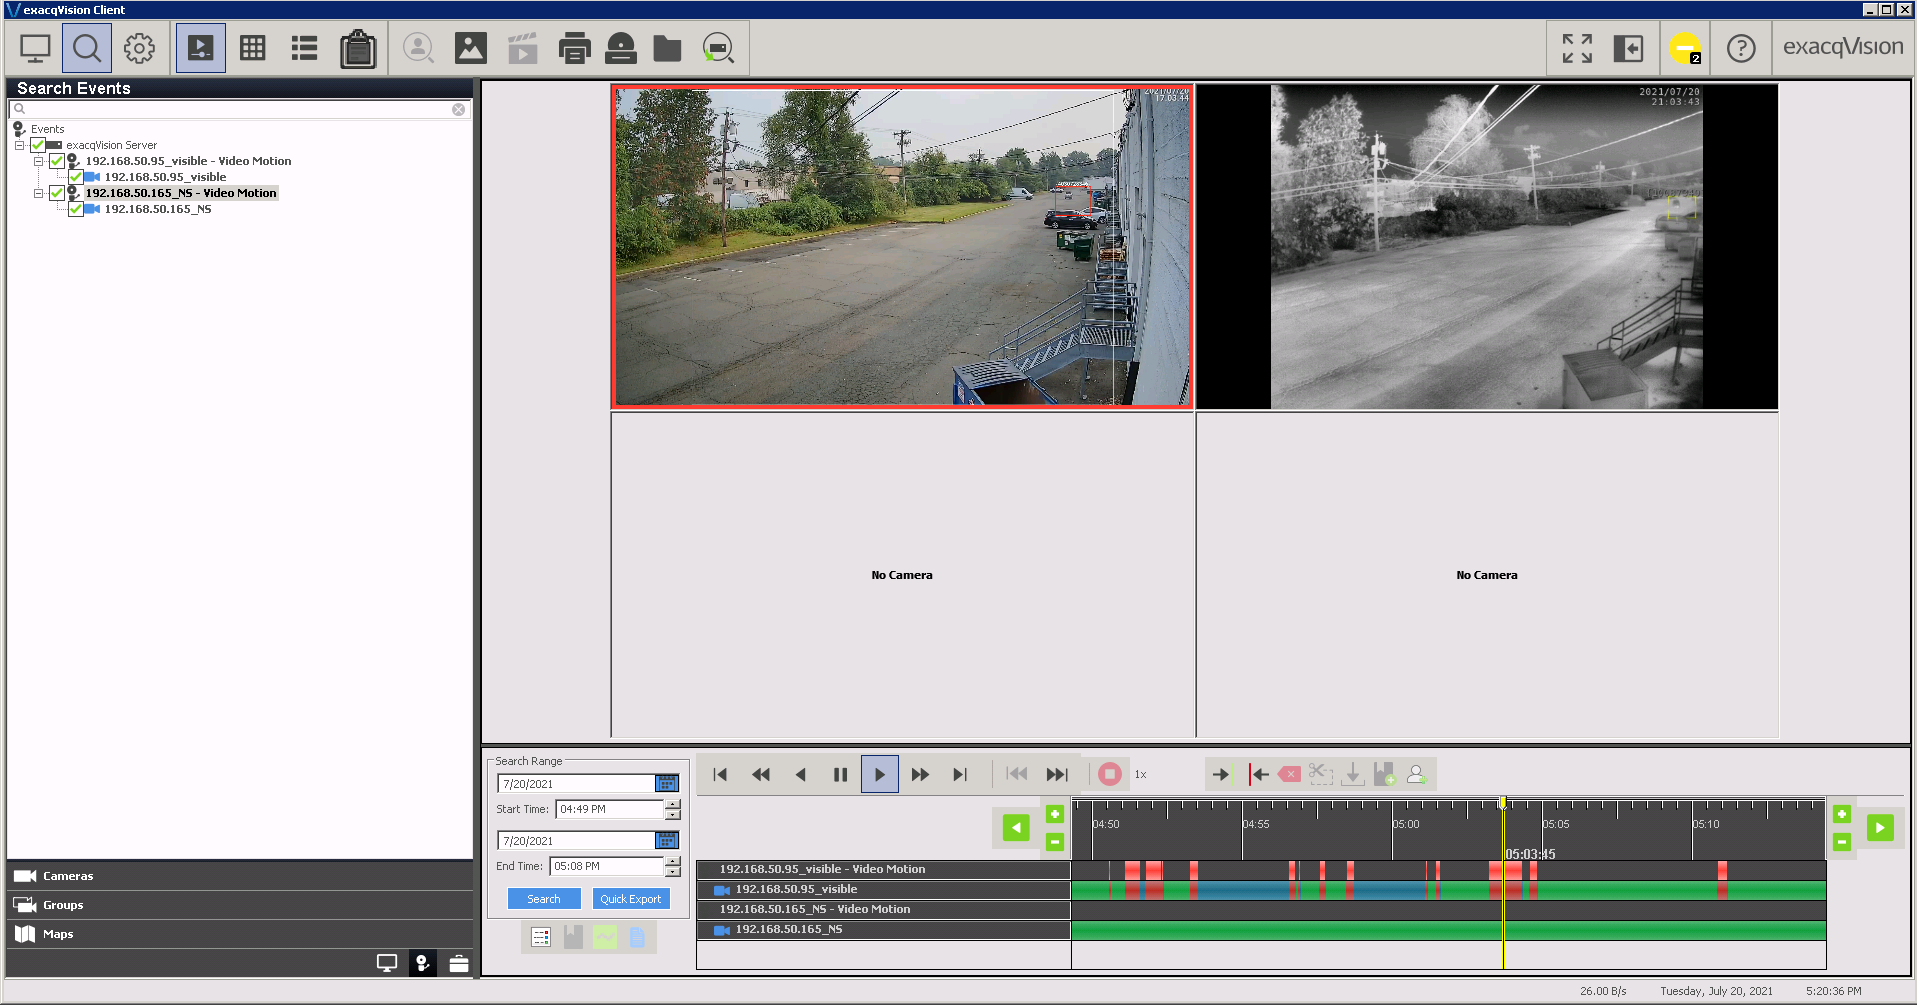
Playback
- Go to search page, and click the alarm icon.
- Check your camera’s box.
- Click Search to refresh the timeline.
- Motion alarm is seen on the bar at the top.
- The red in the timeline is given by your pre/post trigger timing.